

Instructors of a residential teaching environment may experience times when they are not able to deliver class in person. This article provides instructors with the configuration steps and practical tips for using Zoom to teach their course.
Before Class
| Note: You MUST set up your Brown Zoom Account BEFORE proceeding with the next steps.) |
- Open your course in Canvas.
- If you do not see the Zoom tool listed in the left-hand menu, you can update the Canvas Course Navigation to enable the Zoom course tool (though it should already be enabled).
- From the left menu, click Zoom.
- Click Schedule a New Meeting.
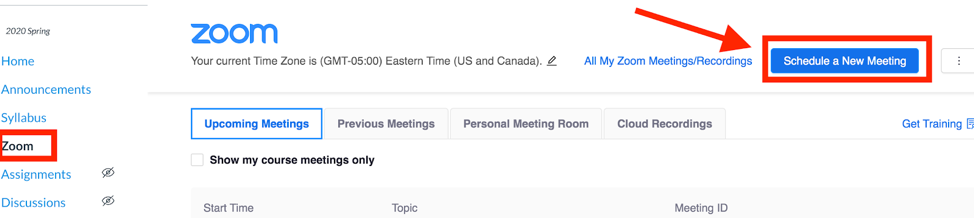
- The Topic header will auto-populate with the name of your course.
- Under Time Zone, check the “Recurring meeting” checkbox, then from the “Recurrence” drop-down menu, select NoFixedTime. (This will generate a meeting link that can be used at any time.)
- Under Meeting Options:
- Enable join before host.
- If this is selected, students will be able to join the meeting before you. We do not recommend this option if you are automatically recording to the Cloud, as the Zoom recording will start as soon as the first participant joins.
- If this is unselected, students who join the meeting before you will see a notice to wait.
- Select Mute participants upon entry. Students will need to unmute their mics if they want to talk.
- If you have TA(s), you may add them as Alternative Hosts so they may start the meeting. They can also manage the administrative functions of Zoom during the class. Alternative Hosts must have previously activated their Brown Zoom account at brown.zoom.us.
- Record the Meeting Automatically. Classes held via zoom should be recorded and uploaded to Canvas to enable students who cannot participate synchronously due to their time zone or other factors to watch at a later time.
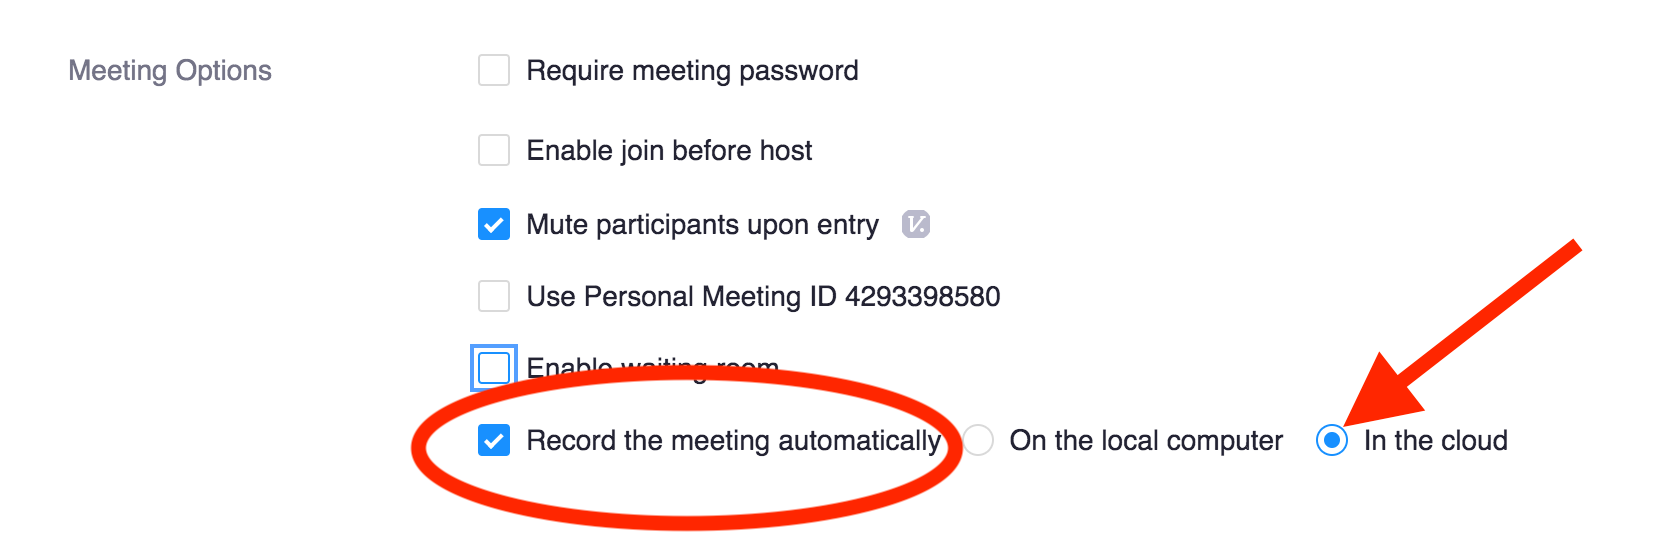
| Note: Zoom provides a simple way of doing this. Select Record the meeting automatically in the cloud; Zoom will start recording when you start the meeting and stop recording when you end the meeting. Zoom cloud recordings will be automatically saved to the course site. **It is important to remember that anytime someone joins this Meeting it will begin recording automatically. It is recommended that you do not have 'Join Before Host' enabled if you plan to record automatically. This combination would result in many superfluous recordings as students join the link before class or outside of class time. |
5. Click Save.
6. Once your meeting has been created, you may:
- Tell students to access the meeting by clicking Zoom from the Canvas menu;
OR
- Copy the Invite Attendees Join URL (https://brown.zoom.us/xx/xxxxxxx) and share it students, guest lecturers, or invited guests;
OR
- Click the Copy the invitation link to copy and send the meeting information listed to your students or guests.
| Note: The course will need to be published for students to be able to see the Zoom links in Canvas. |
Need to schedule Zoom meetings outside of Canvas? Want to review your Zoom advanced settings for teaching security?
E.g., auto saving text chats; configure breakout rooms; be notified when someone joins your meeting; enable participants to record locally; or, disable email notifications when someone joins your meeting before you. |
- Log in to brown.zoom.us to modify and explore the advanced settings
| Note: carefully consider the student experience before changing settings. |
Preparing to Teach
- Once you’ve scheduled your Zoom meeting in Canvas, share the Zoom information and class expectations with your students.
- You may post an announcement in Canvas so students know when and where to meet. In your announcement, let students know what to prepare and expect to do during the Zoom class.
- If you don’t use Canvas, you may email your students the information.
- Plan and share your agenda and remote teaching guidelines so students know when and how they will participate during the session.
- Will they use text chat or audio to communicate? Will they submit something before or after the class? What do they have to do to prepare for the class? All this should be communicated to students before the class begins.
- Do you want to create and launch polling questions?
- If you want to enable breakout rooms, plan what you want students to do while they are in the small group, and how they will know when you want to call them back to the main meeting room.
- Zoom offers tips for students participating in remote teaching
- Zoom offers tips for instructors using Zoom for remote teaching
During Class
We’ve highlighted some simple ways to make your remote classroom a vibrant and engaging learning environment. We recommend that you let students know when the class will end and what to expect after this class.
- Turn on your video so students see you. It makes for a more personal remote teaching experience. Depending on your class size, you can ask students to turn on their videos as well. (We recommend reviewing the Facilitating an Online Lecture guide.)
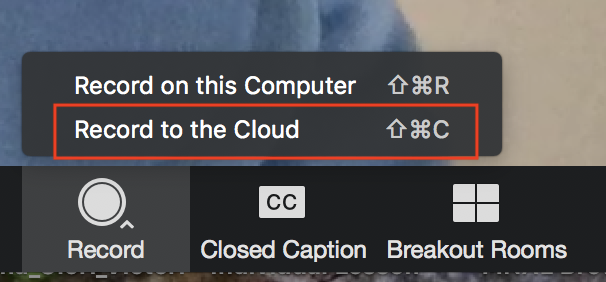
- To record your session so that it may be posted to students later, click the Record button on the lower right of the Zoom screen, and select Record to the Cloud.
| Note: if you set the meeting to record to cloud automatically, you don't need to click the record button.) |
3. Use the text chat or audio to discuss datasets, formulas, a video, an article, etc.
4. Use the Share Screen tool to share documents, websites, images, or slides, etc., and provide different means for representing the information.
| Note: screen sharing for participants (students) is off by default (Learn how to enable it). |
5. Breakout Rooms allow instructors to split a Zoom meeting into small group rooms. Instructors can choose to split students into breakout rooms automatically or manually. Instructors may enter any breakout room at any time and switch between them.
- If using breakout rooms, explain what students are expected to do in the breakout room.
6. End Meeting. Please let students leave the class meeting first. If you end the meeting, it may feel like you are pushing them out of class. Stick around until the last student leaves in case they have any final questions.
Note: Remote teaching in Zoom may feel awkward at first, but you will get more comfortable with it after practicing. Remember that students are not used to learning in this way, either. The key is to communicate expectations and center your teaching on the students – engage them in the process of teaching and learning. |
After Class
Consider what would most benefit your teaching goals and your students before the class begins so you have a plan for after class.
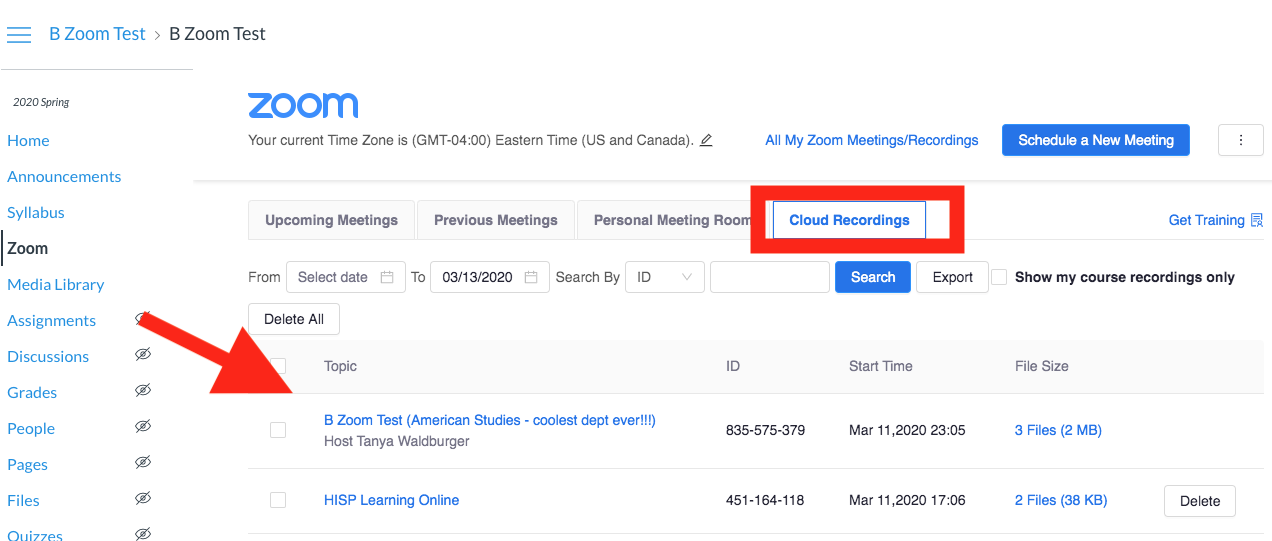
- If you recorded the session to the cloud, you will receive an automated email from Zoom once the recording has processed, then shortly afterwards an email from Panopto indicating the recording has been migrated automatically to the course Canvas Media Library where it will only be available to students enrolled in the course. This process has been enabled for all courses being taught online.
| strong>Note: due to excessive use, text transcription processing may be delayed. If you are experiencing delays, you may view Zoom service status here. |
- If some students were unable to attend the class, you may ask them to watch the recording and complete an alternative assignment so they get a similar learning opportunity as the students who attended.
- Assess students based on your set learning goal. If you didn’t get to hear or assess the students during the session, provide an assessment after the session to allow students to demonstrate their learning.
Top Tips for Teaching with Zoom
- Find a quiet, well lit location. Ensure there is no background noise - fans, washing machines, loud music, etc. Ensure there is adequate lighting if you are using the webcam video.
- Use earbuds with a microphone or headphones.
- Test your audio and webcam before your conference begins: https://zoom.us/test.
- Notify students of Zoom classes or meetings: Let them know they can access the link through Zoom in Canvas, share your Zoom URL via email or Canvas calendar event, announcement, or any other shared digital space that everyone can access. Schedule meetings with Google Calendar (Zoom plugin).
- Establish guidelines and make students aware of your expectations for class.
- E.g., after I lecture for 15 minutes, we will discuss your questions; the TA will monitor the text chat and respond to questions at 10:45.
Record the Zoom class session to the cloud. The audio will automatically be transcribed with machine-based captions (more information about Zoom transcription is here.) You may edit the transcription after the meeting to correct errors. Having lecture capture or video captioned as soon as possible after production is important for students with hearing concerns.
| Note: If you have students who require human-based captioning for accessibility reasons, please contact [email protected] for assistance from Media Services. |
Have Questions?
|