

These instructions are for the Windows version of Word.
First: On Your Computer
- In Microsoft Word, create your labels document. In most cases, you will do this by going to Mailings > Labels and choosing the vendor and size of the labels you are printing (e.g., Avery 5160).
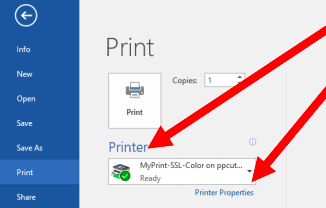
- Click the Print option on the left menu.
- From the list of printers, choose MyPrint-Pro-BW or MyPrint-Pro-Color.
- Click Printer Properties.
- From the One-Click Preset List, choose Labels

- Click OK.
- Click Print.
Second: At the Printer
- As usual, swipe your Brown ID card at the printer.
- Locate and open the bypass tray on the side of the printer.
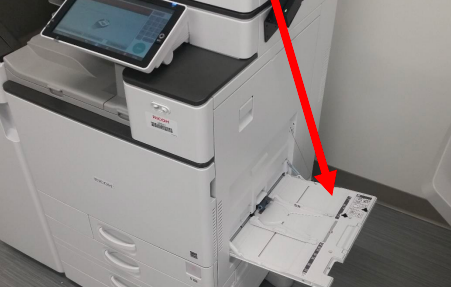
- Place sheet of labels face down.
- As usual, release the print from the touchscreen. (If you're not sure how to do that, see the instructions in the article Pick up Prints from a MyPrint Printer.)