

Set up MyPrint on a Mac
The following steps will add a MyPrint print queue to your Mac computer. These instructions are primarily for students or others who have computers that aren't managed by Brown. If you have a computer managed by Brown, you can ask your computing support staff (ITSC or DCC) to add the queue(s) to your computer.
Add the Print Queue to Your Mac
- Connect to Brown wireless (not Brown-Guest or Eduroam). If off campus, connect to the VPN.
- Click the Apple () menu and select System Settings...
- Scroll down and select Printers and Scanners.

- Click the Add Printer, Scanner, or Fax... button in the lower right-hand corner.
- Select the printer that you wish to add. Undergraduate students should use the
myprint-bwandmyprint-colorqueues. Faculty/staff/grad/med students should use themyprint-pro-bwandmyprint-pro-colorqueues.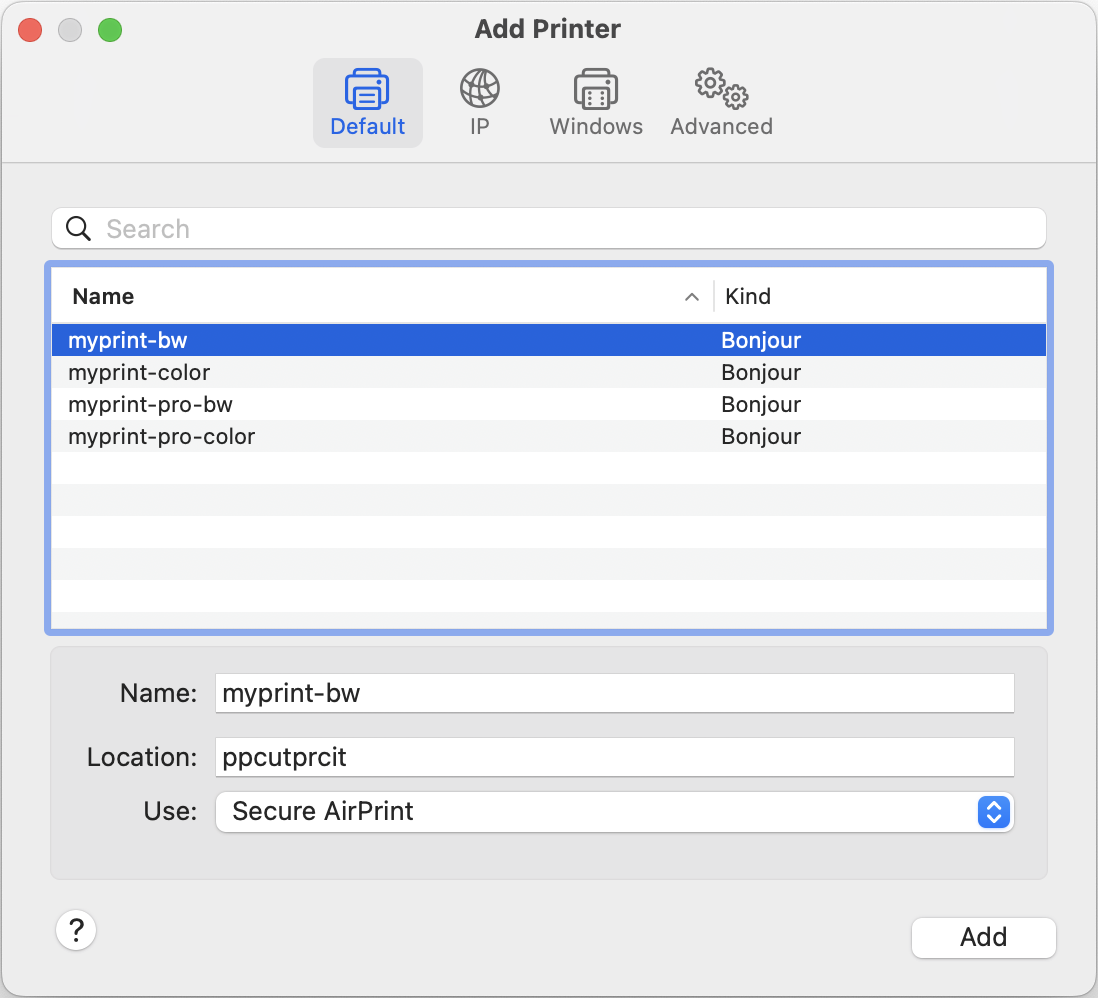
- Click the Add button in the bottom right-hand corner of the Add Printer screen.
- Repeat these instructions for additional print queues you wish to add.
If the list of printers above does not automatically populate, please follow these instructions on how to Set up MyPrint on a Mac via URL.
After following these steps, you can now Print to MyPrint from Your Mac.