

The following steps will add a MyPrint print queue to your Mac computer. These instructions are primarily for students or others who have computers that aren't managed by Brown. If you have a computer managed by Brown, you can ask your computing support staff (ITSC or DCC) to add the queue(s) to your computer. If you encounter any problems, contact the OIT Service Center.
NOTE: These instructions are a backup method, in case the primary method does not work. Please try these instructions first for an easier experience.
Add the Print Queue to Your Mac
- Connect to Brown Wireless (not Brown-Guest or Eduroam). If off campus, connect to the VPN.
- Click the Apple () menu and select System Settings...
- Scroll down or search and select Printers & Scanners.

For versions earlier than macOS 13 (Ventura), you can find Printers & Scanners near the bottom of the icon grid. - Click the Add Printer, Scanner, or Fax... button in the lower right-hand corner.

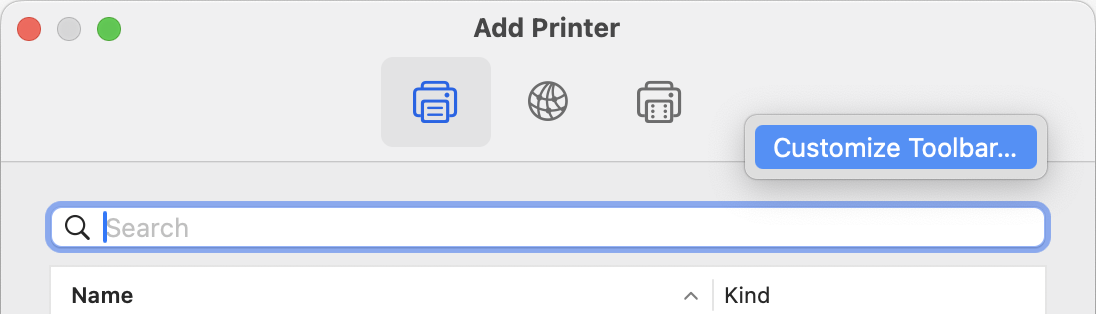
- Right click the Add Printer toolbar and select Customize Toolbar…
- Drag and drop the “Advanced” cog into the toolbar and click Done.
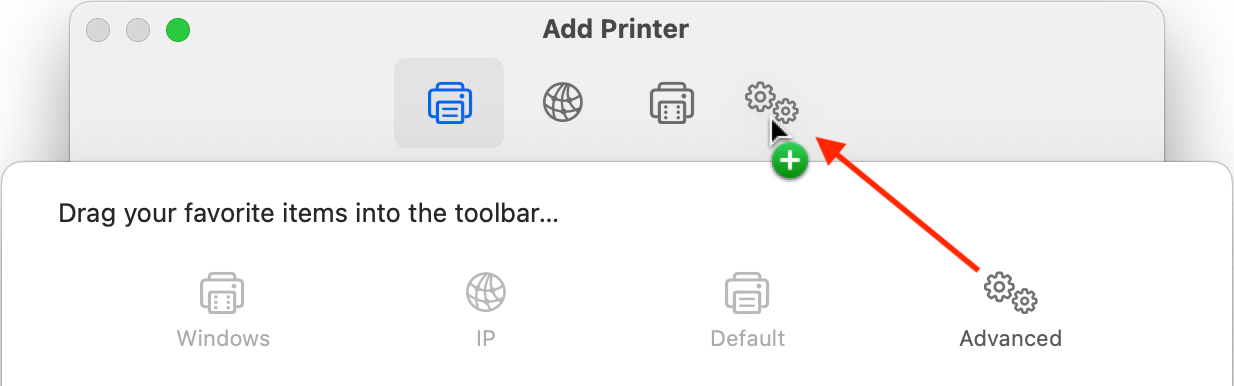
- Click the cog icon you just added.
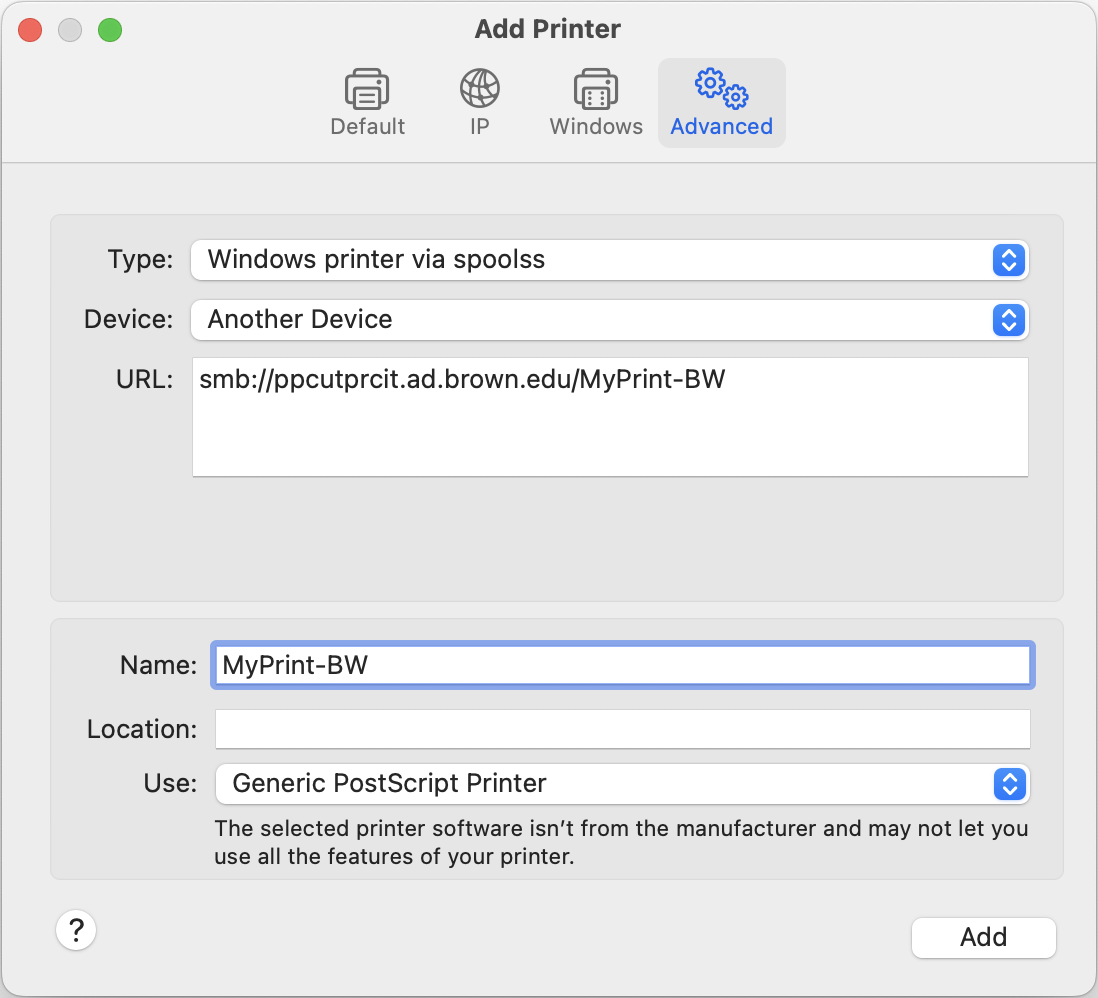
- Add the desired MyPrint queue using the following settings:
- Type: Windows printer via spoolss
- URL:
- Undergraduate students:
- MyPrint-BW —
smb://ppcutprcit.ad.brown.edu/MyPrint-BW - MyPrint-Color —
smb://ppcutprcit.ad.brown.edu/MyPrint-Color
- MyPrint-BW —
- Faculty/staff/grad/med students:
- MyPrint-Pro-BW —
smb://ppcutprcit.ad.brown.edu/MyPrint-Pro-BW - MyPrint-Pro-Color —
smb://ppcutprcit.ad.brown.edu/MyPrint-Pro-Color
- MyPrint-Pro-BW —
- Undergraduate students:
- Name: Something recognizable, such as the names listed above (e.g. MyPrint-BW)
- Use: Generic PostScript Printer
After following these steps, you can now Print to MyPrint from Your Mac.