

In Human Subjects Research, you must keep survey responses separate from any identifying data such as email address. However, you may need to follow up with someone who hasn’t yet responded, or compare a participant’s response from one survey to the next in a longitudinal study.
We have documented two recommended setups for this type of research. Both use a participant ID. In the setup described in this article, the participant ID is automatically generated when the participant takes a screener survey. In the setup described in a second article, Use Qualtrics for Human Subject Research: Using Pre-Generated Participant IDs, you assign the participant ID in a spreadsheet and upload it to a Qualtrics panel.
Using a Screener Survey
In this scenario, you have not yet assigned participant IDs. You have a screener survey that you are using to collect contact information and/or determine whether the participant is eligible for the study.
At the end of the screener survey, the participant will automatically be redirected to a second survey which will collect data for your study (let’s call this the “research survey”). (If you have criteria for participation, you can use survey logic to only redirect eligible participants.)
When they are redirected, Qualtrics will pass along a participant ID. The research survey will store its research data with their participant ID, but the data will remain separate from any sensitive personal data stored in the first (screener) survey.
First: Create the Research Survey
This is the second survey the participant will take. You don’t need to add all the questions yet, we’re just setting it up now so we can get its link.
-
Create a survey. (New to Qualtrics? Here’s their basic documentation on creating a survey.) You can add questions now or do it later.
-
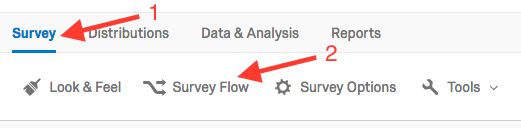
Click the Survey Flow button at the top of the survey.
-
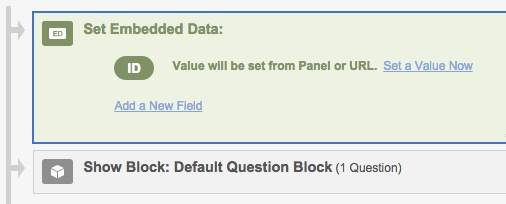
Add a new element, and choose Embedded Data as the type, and name the field ID - it’ll look like the image below. This is where the value passed from the screener survey will be stored.

-
Click the Move link and drag this Embedded Data flow element above, but on the same hierarchical level, as the Default Question Block. We like it to be first so any future logic in our survey won’t skip over it. After you move it, the two blocks will look like this:
-
Click the Launch Survey button and Activate the survey. (Don’t worry if you’re not done with your questions - as long as you don’t share this link with participants yet, it’s fine to add questions after activating).
-
You will now see an anonymous survey link on the page - copy this, you’ll need it in the next section.
Optional: If you want to be sure that the embedded data is coming through, you might want to put in a branch that checks for the embedded data and prevents someone from taking the research survey if it's not present. (Usually this is not a problem.)
Second: Create the Screener Survey
-
Create a survey and add questions. (New to Qualtrics? Here’s their basic documentation on creating a survey.)
-
Click the Survey Flow button at the top of the survey.
-
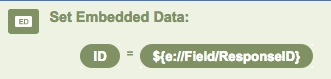
Add a new element, and choose Embedded Data as the type. Call this field ID as you did before, but this time, click Set a Value Now, and set it equal to ${e://Field/ResponseID} (you can just copy and paste that value into the text box). This ResponseID refers to a randomly generated unique value that Qualtrics already creates every time someone fills out your survey. When you’re done, it will look like this:
-
As previously, click the Move link inside the element box, and drag this Embedded Data flow element above (but on the same hierarchical level) as the Default Question Block. We do this so that every survey participant is assigned an ID before answering the questions. After you move it, the two blocks will look like this:

-
Go to the Survey Options, under the Edit Survey tab, in the Survey Termination section, select Redirect to a URL.
-
Paste the anonymous survey link for the other survey (Research Survey) - the link you copied at the end of the last section of instructions - into the text field provided. At the end of this link add the following text:
?ID=${e://Field/ID}
(Note: if there is already a question mark in the address, use a & instead of the ?)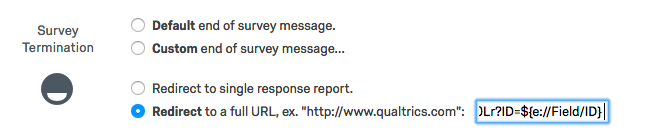
-
As usual, Launch your screener survey and share the anonymous link with participants.
Third: View Responses
When you download your data from the Research Survey, the value indicated in the ID column will correspond to the ResponseID value in the data for the Screener Survey.