

In Human Subjects Research, you must keep survey responses separate from any identifying data such as email address. However, you may need to follow up with someone who hasn’t yet responded, or compare a participant’s response from one survey to the next in a longitudinal study.
We have documented two recommended setups for this type of research. Both use a participant ID. In the setup described in this article, you assign the participant ID in a spreadsheet and upload it to a Qualtrics panel. In the setup described in a second article, Use Qualtrics for Human Subject Research: Using a Screener Survey, the participant ID is automatically generated when the participant takes a screener survey.
Using Pre-Assigned Participant IDs
In this scenario, you start with an Excel spreadsheet with participant info and pre-assigned participant IDs. In Qualtrics, Panels allow you to send out surveys to specific people using their e-mail. In order to still keep data anonymous you need to somehow be able to have an ID# in data and not their personal information. When they click on the link in their email the following instructions will allow you to add variables in your data to track who is who anonymously- especially if you send them multiple surveys
First: Create Your Participant Spreadsheet
-
Use the format below to create your panel. It needs to be saved as a .csv - you can create it in Excel. The first four headings have to be exactly the same as the example: FirstName, LastName, Email, ExternalDataReference. The rest of the headings can be whatever variables you want embedded in your data set. One of these should contain the same participant ID as is in the ExternalDataReference column. In this example, we called that column “ID” - you can call it something different as long as you use that name consistently when following other parts of these instructions which refer to ID.
You can include the name and email address as it they will be stripped out of the results as long as you use the recommended column names (FirstName, LastName, Email, ExternalDataReference). Including the name in the panel allows you to personalize the email you will be sending out for survey. By following the rest of these instructions, Qualtrics will omit any information in the first four columns, leaving only the ID (and whatever other additional columns you add) in the dataset at the end of the survey.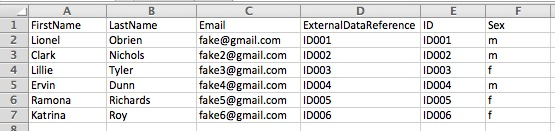
Second: Create the Survey
-
Create a survey. (New to Qualtrics? Here’s their basic documentation on creating a survey.)
-
Create a new panel, choose to import from a file, and upload your .csv file. If you’ve never created a panel before, Qualtrics has instructions here. When you upload the .csv file into the panel, the column with the heading "ID" (and any additional columns you added to its right) should be in blue, the rest should be black.
-
Now, you will add Embedded Data to the survey so the ID, as well as any additional columns you added to its right, will be included in your data set. Click the Survey Flow button.

-
Click Add New Embedded Data Field
-
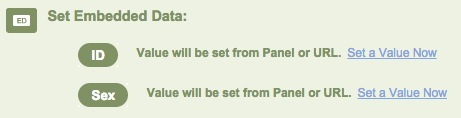
Create embedded data elements for each of your custom column headers. The naming needs to be exactly the same. In this case, I have ID and Sex.
-
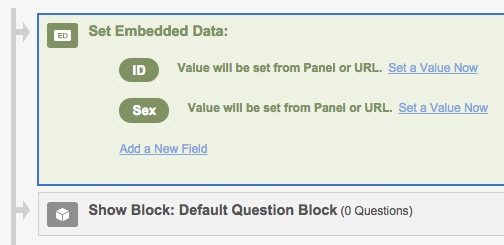
Move this element to the top of the survey flow by clicking Move and dragging it up. It should look something like this when you’re done:
-
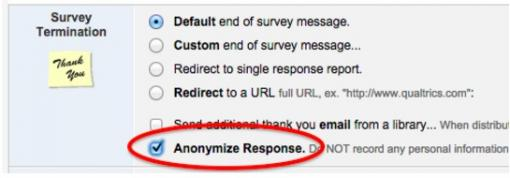
Important: At the top of the survey, click Survey Options and then check the Anonymize Responses checkbox, and Save Changes.
-
Now your survey is set up! To send emails, follow instructions for Using the Qualtrics Mailer, indicating your panel in the To field. After the initial distribution, you can track how many participants have responded and use the Send Reminder or Thank You feature to follow up with participants.
Third: View Responses
When you download your data, it will not include the values in the first four columns of your panel. However, it will include the ID so that you could, for example, identify participants who should take a second survey based on their responses to the first, or compensate participants for their effort, using the contact information in your original .csv.
To maintain confidentiality, take precautions if you download and store your survey responses and panel .csv; for example, you might password protect these files, password protect your computer, and/or obscure the file names so the relationship is not obvious to someone who might unexpectedly access your files.