

Supplied Equipment
(1) One Zoom H1 Handy Recorder
(1) One USB Cable
(1) Micro SD Card
Part Name and Functions
Front View
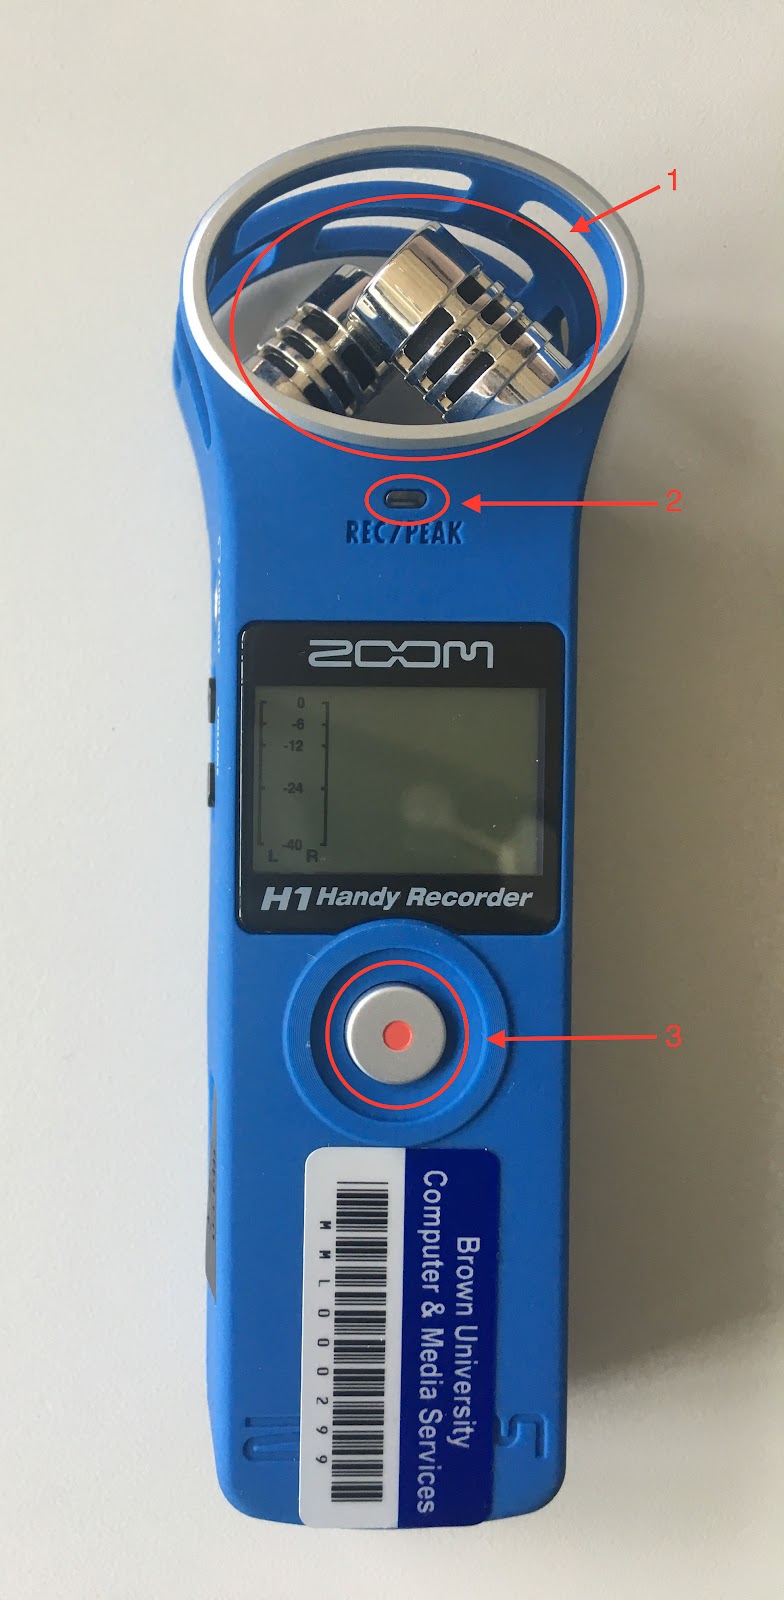
1 -- Stereo Microphone: Record sound in stereo in a 90 degree field in front of the recorder
2 -- Recording/Peak Indicator: This lights during recording and blinks rapidly if the input signal is too loud (peak detection)
3 -- Record Button: Use to start and stop recording and to confirm prompts such as file deletion, for example.
Side View


Preparing to record
LO CUT Filter
The LO CUT filter switch is found on the back of the recorder, and this function is used for noise reduction. When ON, the sound of the wind and other noise can be reduced.
Input Level
Use the +/– INPUT LEVEL buttons on the right side of the recorder to adjust the level of the input signal. For automatic adjustment, set the AUTO level switch on the back of the recorder to ON.
Recording Format and Bitrate
Set the Recording Format switch on the back of the recorder to WAV. Use the fast forward >> and rewind << buttons on the right side of the recorder to set the bitrate. For podcasts and other audio-only recording, we recommend the sampling rate be set to 44 kHZ, and you can choose between a bit depth of 16 and 24.
You can find a picture of these settings below:

How to record
You can start recording from the home screen by pressing the Record Button on the front of the recorder. Press this button again to stop recording and return to the home screen.
The H1's built-in X/Y microphone provides two matched unidirectional microphones set at a 90 degree angle relative to one another, optimum for most stereo recording applications.
Note: If no microSD card is in the unit, you can get one from the IT Service Center Desk.
How to play audio back
To play back recorded audio, press the play/pause button on the right side of the recorder. Playback automatically stops after all the files have been played. Press the Record Button to return to the home screen.
How to transfer audio to a computer
Connect the recorder to the computer using the supplied USB cable. The recorder will turn on and after about 5 seconds, the word USB will show on the screen. After that, the recorder should appear on your computer the same as a USB flash drive. If you are using an audio editing software, you should be able to directly import from the recorder using the software's “import” functionality; otherwise, drag and drop the files to the desired location on the computer.