

One of the many types of equipment the IT Service Center has available to borrow is the Sony FDR-AX53 digital camcorder. The FDR-AX53 is a full-featured, professional video camera, and the number of settings may be overwhelming to someone unfamiliar with advanced videography equipment or specifically the Sony brand. This guide is meant to provide the basics for getting up and running with the FDR-AX53. If you would like a reference which covers all of the more advanced functions, the online help guide is available here, as well as a PDF version of the paper manual.
Supplied equipment
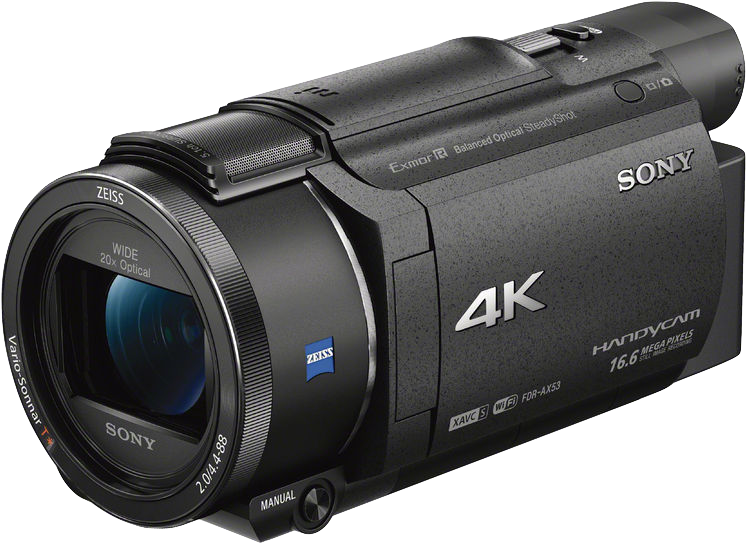
- Sony FDR-AX53 camera
- charger
- USB cord
- SD card reader
- RØDE VideoMicro microphone
- furry wind shield
- camera cold shoe mount
- Aputure AL-M9 Amaran LED light
- colored gels
- USB cord
- camera cold shoe mount
Quick start guide
To get started with the camera, read over this list for a quick summary of the basic functions.
- To turn on the camera, simply open the pop-out screen.
- To zoom in and out, tilt the W/T control at the top of the camera to the right or left respectively.
- To record video, or stop recording, press the Start/Stop button, located by your right thumb.
- If you want the camera to handle all the decisions, tap the button in the bottom left and enable "Intelligent Auto" mode.
- For instructions on using the external microphone or light, see the Using the optional accessories section below.
Understanding video options
When recording, it's important to select the right resolution, bit rate, and frame rate options for your project. Here's a quick overview of what these settings mean and when you might want to use each.
To access these settings, tap the Menu button in the top right of the touchscreen, and then select "Image Quality/Size".
Bit rate ("REC Mode")
The options under this heading specify how much data the camera uses to encode the video. In other words, the higher you set this setting, the higher quality the video will be, but the more space it will take up. Conversely, lower settings will take up less space, at the expense of quality.
Frame rate
Depending on the format used, you may set the camera to record 60p, 30p (60i), or 24p frames per second. If you want a more film-style look, you might wish to record at 24fps. For capturing fast movement, 60fps will provide very smooth motion, but some people are of the opinion that it looks unnatural. In order to record at 60fps, you must be at a lower resolution than 4K. Most internet video is recorded at 30fps, which is essentially equivalent to 60i.
Resolution and recording standard ("File Format")
The FDR-AX53 offers three options for recording format: XAVC S 4K, XAVC S HD, and AVCHD. If you need the maximum possible resolution (either for displaying on a 4K screen or to enable cropping to 1080 without losing quality), you should select XAVC S 4K. If you don't need 4K resolution, or need to record at 60fps, select one of the other two options. XAVC S HD and AVCHD are essentially the same, except the former can record at slightly higher quality and takes slightly more space.
Advanced controls
Various recording settings can be manually set for fine-grained control over the recording output. Using the Menu > Camera/Mic settings pane, you can manually adjust settings including white balance, exposure, aperture, image stabilization, and more. You can also customize the function of the manual ring (the ring around the end of the camera) between zoom, focus, or several other functions.
This camera has a built-in 5.1-channel microphone. If you want to record your video with surround sound, set the format to AVCHD, and ensure the Audio Mode (in Camera/Mic settings) is set to 5.1ch Surround. Note that surround sound playback requires equipment and software which supports it.
For more information about the more advanced capabilities of the FDR-AX53, refer to the online help guide, available here.
Connecting to a computer
When you're ready to copy your pictures to a computer, remove the SD card and connect it to your computer:
- Open the SD card flap, found on the left side of the camera, covered by the fold-out screen.
- Push the SD card in to release it from the catch, then remove it.
- Using the supplied SD card reader, or your computer's built-in SD card slot if it has one, connect the card to your computer.
- Using your video editing software, such as iMovie, Adobe Premiere, or Final Cut, import the recordings from your computer.
- Eject the drive from your computer and remove the card once it is safely ejected.
- Replace the SD card in the camera, taking care to orient it with the label facing the battery, and push it in until it clicks.
- Close the door flap.
Charging
The FDR-AX53 does not come with a separate battery charger; rather, the battery is charged by plugging the camera in to a power source. Use the included power adapter to connect the camera to power. The cord plugs into the "DC IN" port just to the bottom-right of the battery.
Using the optional accessories
The camera kit comes with some accessories which may be useful.
RØDE VideoMicro microphone
To use the microphone with the camera, attach it using the mount.
- Open the shoe mount cover on the top of the camera: pull up on the right side of the plate and make sure the flap lies fully open to the left.
- Slide the mic holder into the mount and tighten the circular dial to secure it in place (take care not to tighten it more than necessary, as it will run into the flap and could damage the hinge).
- Slide open the flap on the right side of the camera.
- Connect the microphone to the mic input port using the red audio cord.
Aputure AL-M9 Amaran LED light
The LED light can be used as an on-camera or remote light source. Use the switch on the side to turn on the light, and adjust the brightness with the + and − buttons.
Camera mount
If not being used in conjunction with the microphone, the light can be mounted on the camera using the cold shoe mount.
- Open the shoe mount cover on the top of the camera: pull up on the right side of the plate and make sure the flap lies fully open to the left.
- Slide the holder, found in the light's case, into the shoe mount. Tighten the black plastic dial to secure the mount (take care not to tighten it more than necessary, as it will run into the flap and could damage the hinge).
- Orient the holder with the metal screw facing toward you and tighten the smaller black plastic dial to secure the holder position.
- Place the light into the holder and tighten the metal screw to secure it.
Filters
The light comes with three filters which can be used to adjust the light qualities as desired. To use one of these filters, remove the white plastic from the front of the light (it is held by magnets; simply pull to remove it). Align the filter in front of the LEDs, then replace the white plastic.
Charging
To charge the battery, use the USB cord supplied in the light case. Plug it in either to a computer or a USB wall adapter, such as the one included for charging the camera.
Support
If you need help with your Sony FDR-AX53, you can contact Sony here. Alternatively, if you have borrowed it from the Brown IT Service Center, we can also provide assistance; simply visit us on the fifth floor of J. Walter Wilson, call us at 401-863-4357, or chat us during our open hours using the button at the bottom right of this page.