

Connecting to the printer in 70 Ship St. room 519 from a Mac
- Make sure you are on Brown (secure) WiFi, connected to the VPN, or using a wired network connection on the Brown campus
- Click on the Apple menu (top-left corner of the screen), then on System Preferences or System Settings (depending on macOS version). This will open the System Preferences/Settings app.
- Click on Printers & Scanners (or a similarly-named section, depending on macOS version)
- In the printer dialog box that appears, click Add Printer or the + (plus sign) beneath the list of printers on the left to add a printer. The "Add Printer" dialog box will appear.
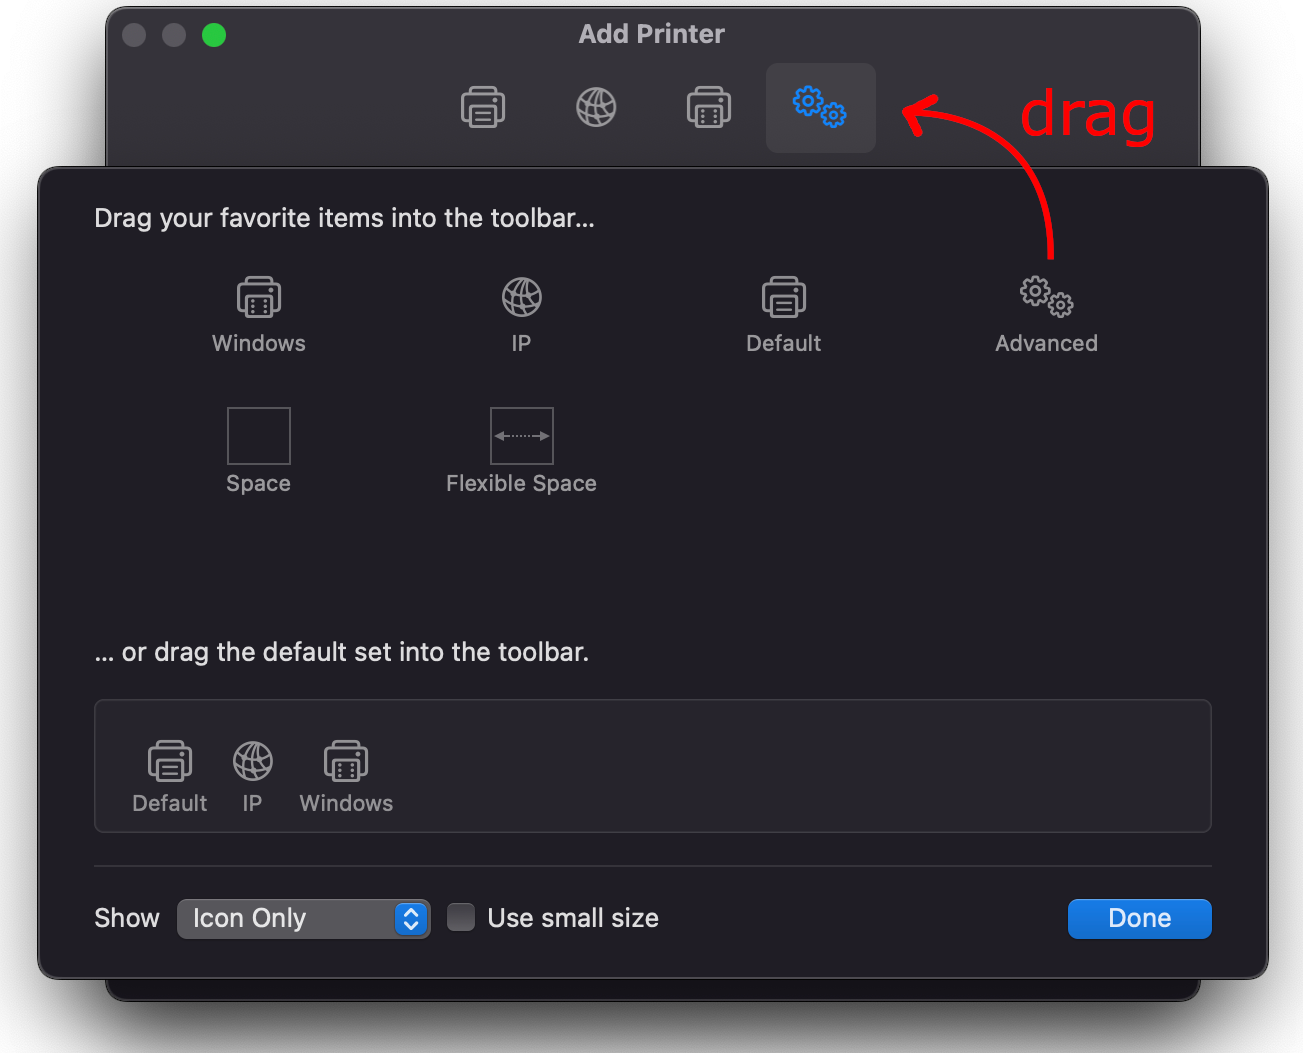
- Right-click or control-click on the toolbar at the top of the "Add Printer" window where the tabs/icons are, and then drag the “Advanced”/gears icon into the toolbar (i.e. where it’s shown in blue below) as shown below. When finished, click Done.
- Click on the newly-added Advanced tab (with the gear icon), wait for it to finish “Searching for printers…”, and then set up the printer as follows:
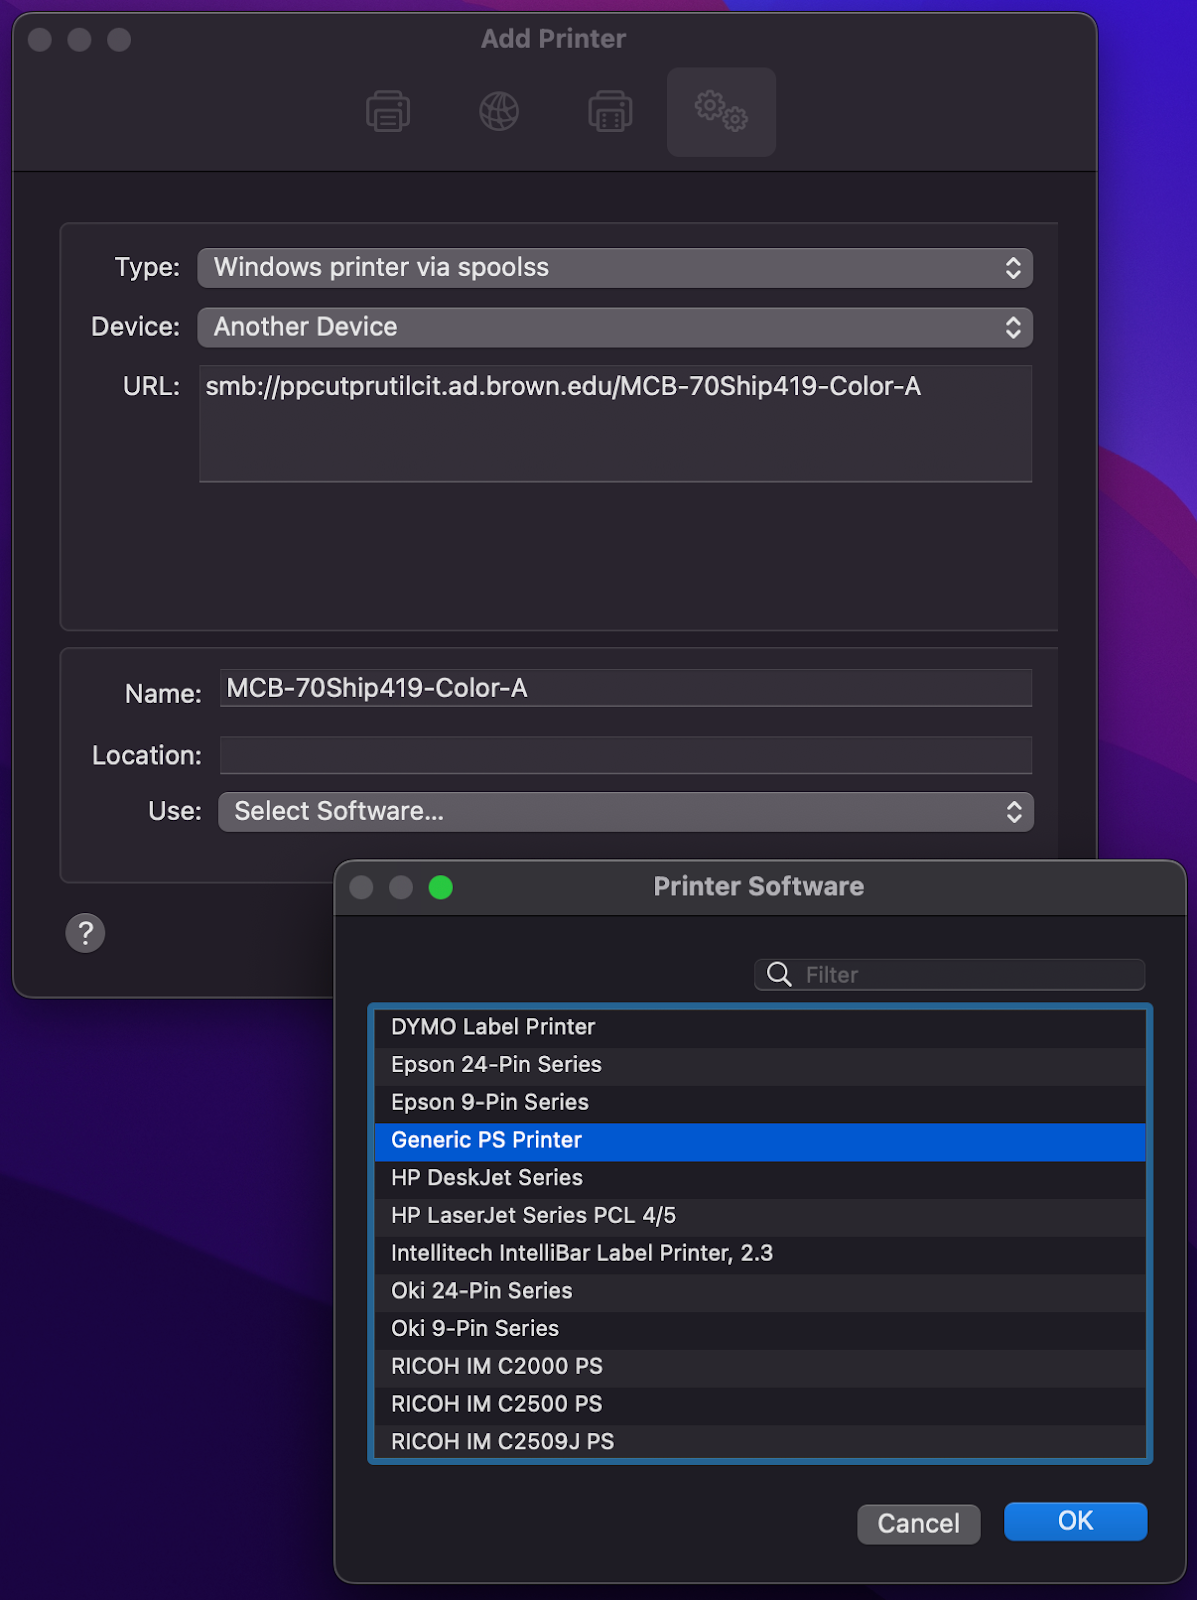
- Type: "Windows printer via spoolss"
- Device: Another device (default option)
- URL: smb://ppcutprutilcit.ad.brown.edu/PLM-70Ship519-BW?encryption=no or smb://ppcutprutilcit.ad.brown.edu/PLM-70Ship519-Color?encryption=no
- Name: PLM-70Ship519-BW , PLM-70Ship519-Color, or whatever else makes sense to you in order to identify the printer
- Use: click the drop-down box, then “Select Software”, and in the screen that pops up choose “Generic PS Printer”:
- Click Add, and then click OK/Continue through any prompts that come up; be sure to check any box for “Duplex” or “Duplexer” that pops up, to enable two-sided printing
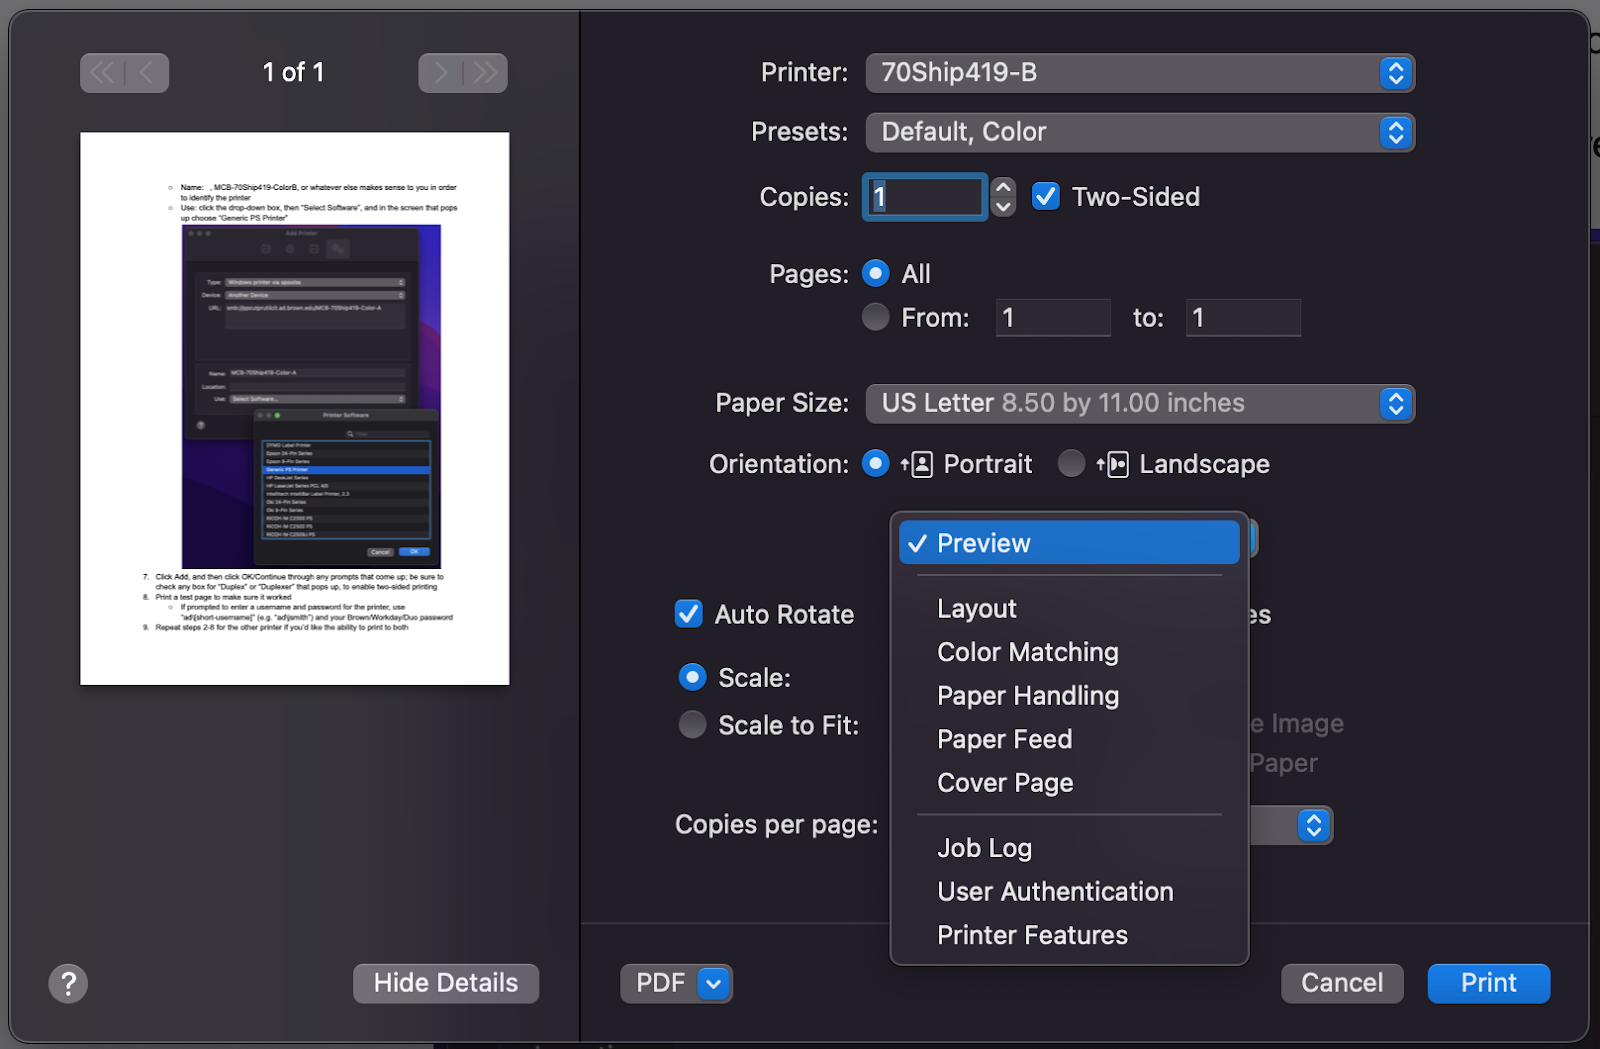
- Open a document on your computer with which to test printing, and select File > Print; you can also use Google Chrome and press Option-Command-P to “Print with System Dialog”.
- In the standard macOS printing dialog window that comes up, change the Color Mode to "Color" by doing the following:
- Select the “Printer settings” option from the drop-down box right under where you pick portrait or landscape printing:
- Set the color mode to “Color”:
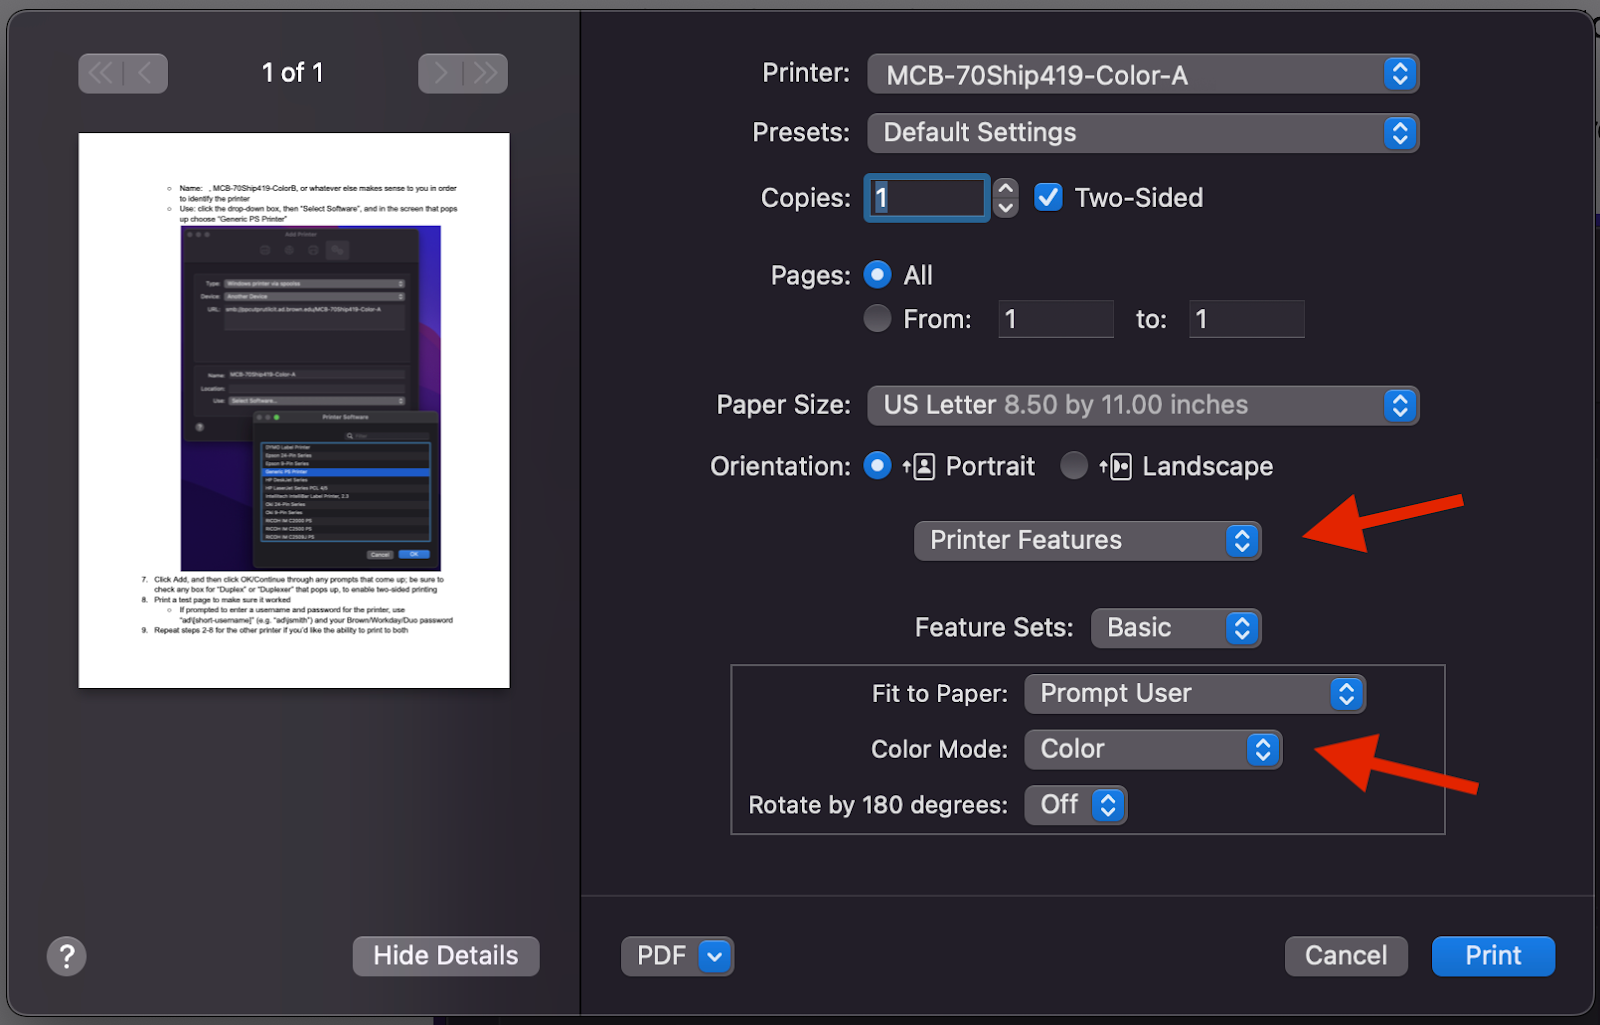
- Select the “Printer settings” option from the drop-down box right under where you pick portrait or landscape printing:
- Print a test page to make sure it worked
- If prompted to enter a username and password for the printer, use your Brown username and password
- Repeat steps 2-10 for the other printer if you’d like the ability to print to both