After sending a scanned document to OneDrive, you’ll receive an email notification from Papercut that your scan is available. Papercut is the engine behind the MyPrint system that manages the scanning process. When you send your first scan, Papercut will send an email requesting permission to communicate with your OneDrive folder. After that, scans will show up automatically in your OneDrive folder whenever you use the service (scanned files can be found in the Scans for Papercut MF folder, within the Apps folder, on your OneDrive).
The instructions below will guide you through the process for setting up your OneDrive account to receive scans from the MyPrint system. If you’re not familiar with using your OneDrive account, please visit the Get Started with Microsoft OneDrive article.
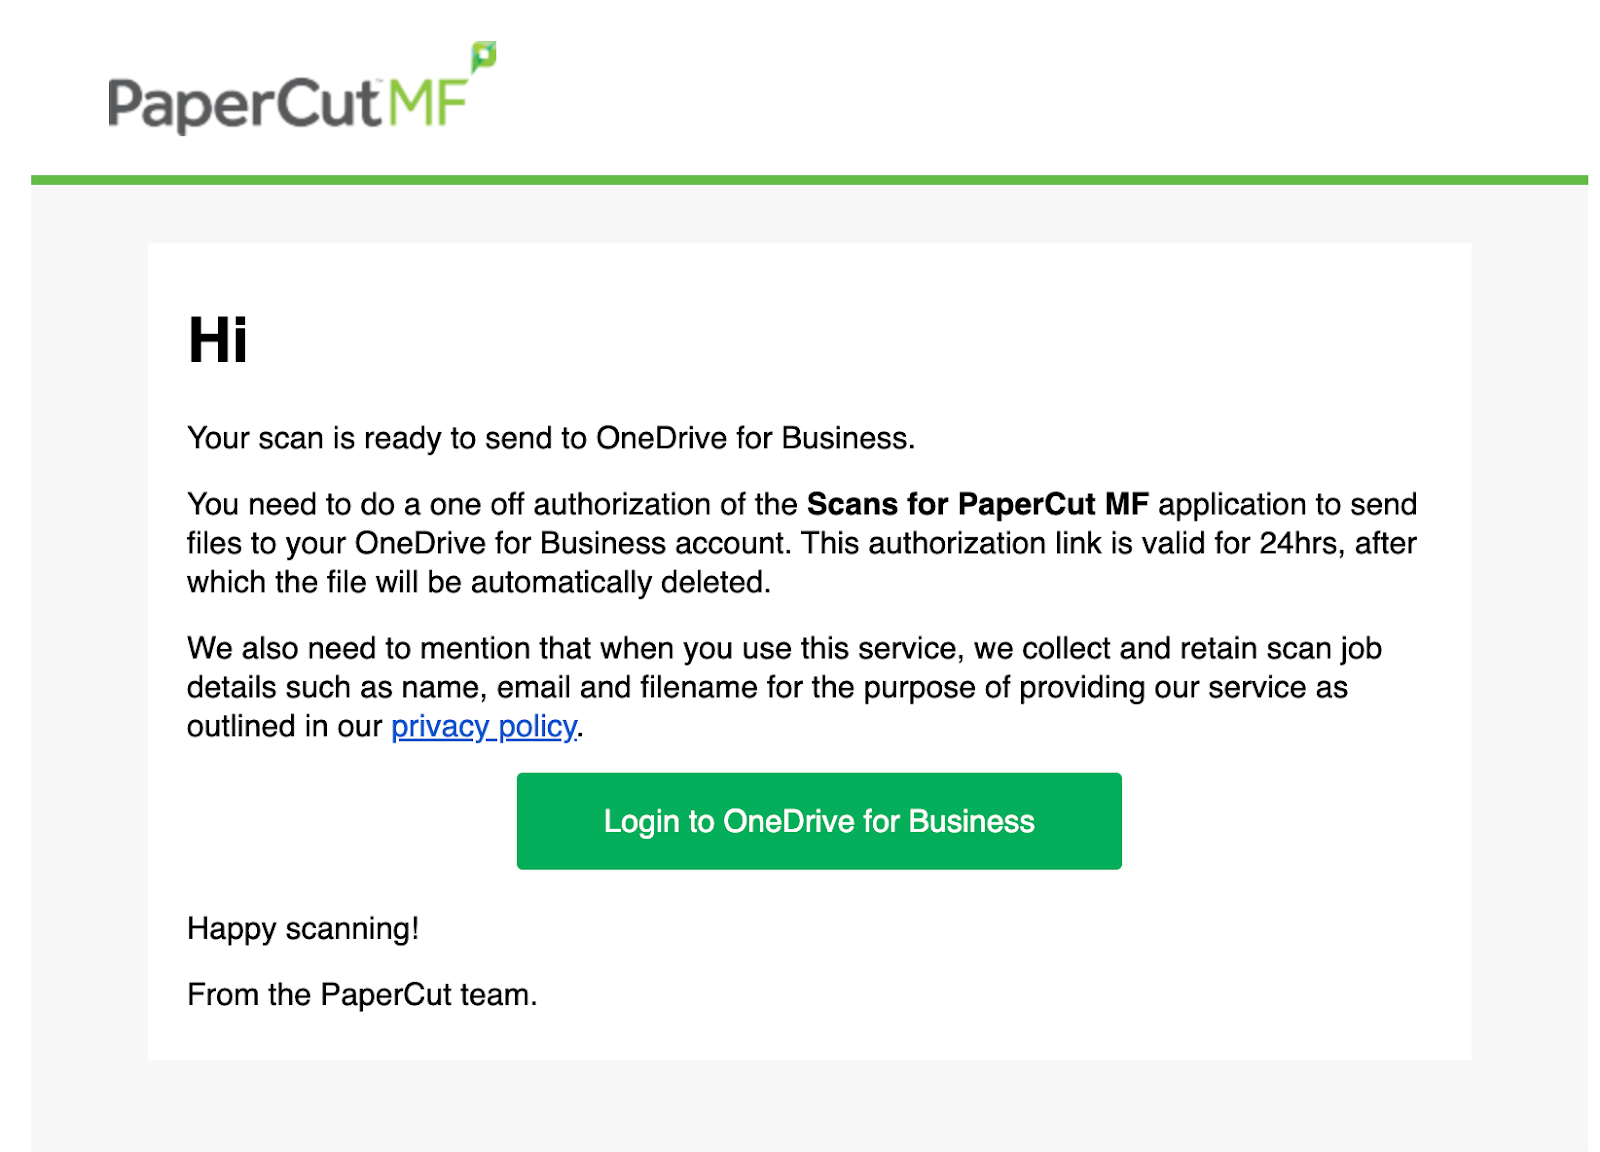
1. After sending a scan from the device, you’ll receive an email to authorize Papercut to create a folder in your OneDrive account that it will upload scanned files to.
![]()
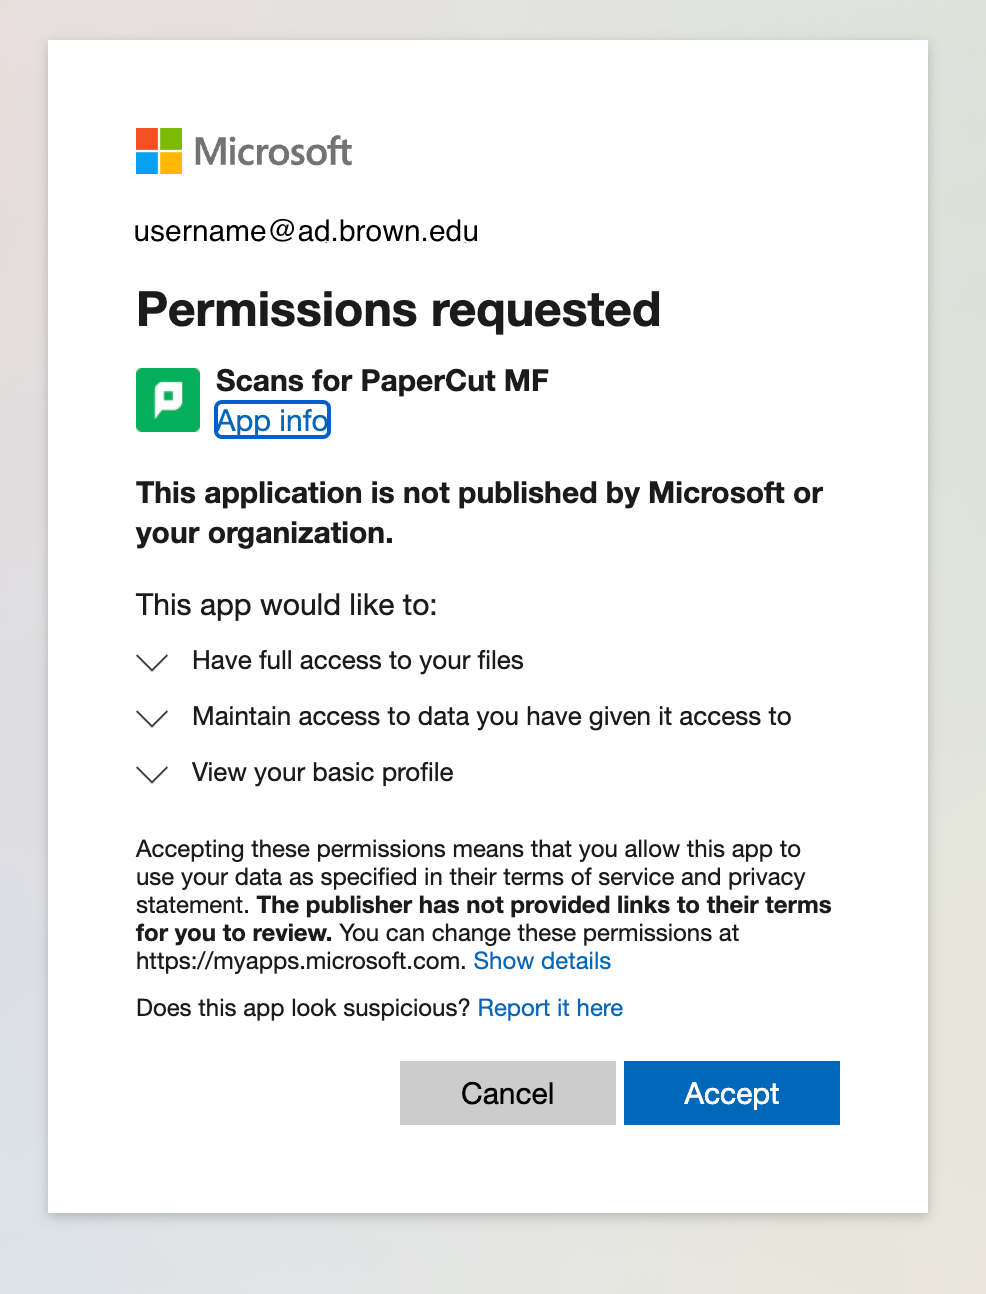
2. Within the email, click Login to OneDrive for Business. The link will take you to a Microsoft terms and agreement page.
3. Select Accept to allow Papercut to upload files to your OneDrive account.
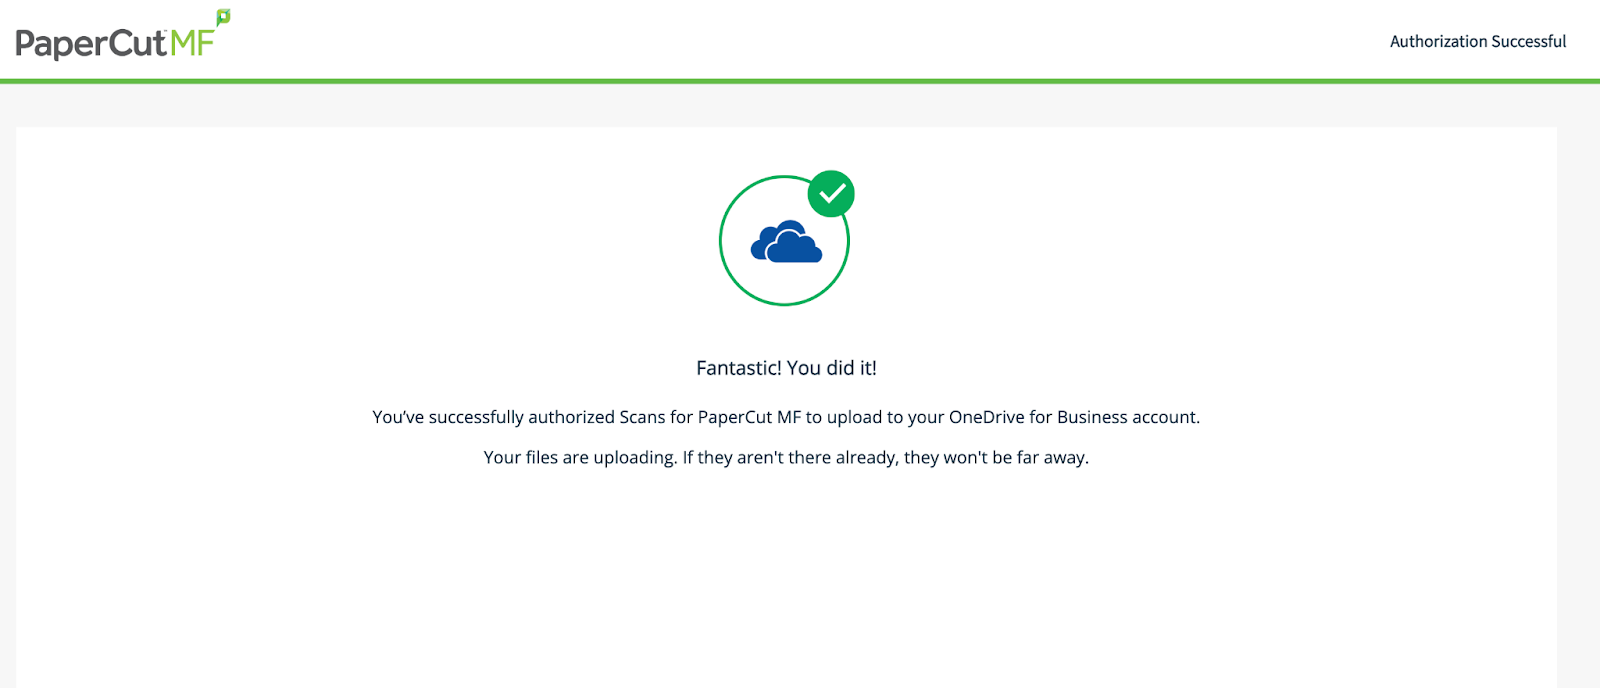
4. Congratulations! Papercut can now begin sending scans to your OneDrive account.