Each Type of License Explained
Adobe has changed the way they license software for all Adobe products. What used to be called “Named” and “Serial” is now called “Named Device License” vs “Shared Device License” (SDL).
Named Device License
The Adobe portal has configured all of the “eligible” users via a back-end synchronization process tied into our campus IDM system. If a faculty, staff or student is eligible for access to any Adobe software products, it will be listed in the Adobe portal as an entitled user, therefore granting the user access to Adobe software using two-factor access to install and use the Adobe software.
Accessing Adobe via the Named Device license requires the software to be installed using the Named Device license installation. There are several ways a user/ITSC can get Adobe software installed.
SCCM: In SCCM there is an individual Adobe package identified by “Named” in the title of the application for each of the Adobe software products available. You can simply deploy the “program” to the end-user collection and they will receive the Adobe software product
Partner’s Share: Endpoint Engineering maintains a folder structure whereas anyone who is authorized to access the Endpoint Partner’s Share, can map or browse to the following file location and install any Adobe software from this location by running setup.
\\files22.brown.edu\dfs\CIS_ClientEngineering\partners\packages\adobe-creativecloud
Adobe Creative Cloud Desktop Download: On softwarecatalog.brown.edu there is a link to an article which gives detailed instructions on how to install the Adobe Creative Cloud Desktop application which allows a user to install right from the Adobe cloud any of the Adobe applications once authenticated using two-factor.
Shared Device License (SDL)
For users who are not classified as the standard Faculty, Staff or Students and use Brown owned computers, they are entitled to use the Adobe software. However, they must use a Shared Device License (SDL) in order to access Adobe Software. These users are usually classified in a different way other than standard Faculty, Staff, or Students. The requirement for access a SDL is the user must create an account with Adobe using a valid email address which can be an @brown.edu email address but doesn’t have to be.
Access Adobe via the Shared Device License is very similar to accessing Named Device License. The difference is you first need to install the Named Device License product, then immediately after installing the Named software product you will need to run the Shared Device License application which changes the way the Adobe software is licensed.
There are several ways a user can get Adobe Named software installed:
SCCM: In SCCM there is an individual Adobe package identified by the label “Shared” in the title of the application for each of the Adobe software products available. You can simply deploy the “program” to the end-user collection and they will receive the Adobe software product. The configuration of the SDL is slightly different in SCCM as it will first install the Adobe named application such as Photoshop, then immediately after installing Photoshop, it will install the SDL which converts the license from Named to Shared.
Partner’s Share: Endpoint Engineering maintains a folder structure whereas anyone who is authorized to access the Endpoint Partner’s Share, can map or browse to the following file location and install any Adobe software from this location:
“\\files22.brown.edu\dfs\CIS_ClientEngineering\partners\packages\adobe-creativecloud”
Install all or any of your Adobe application and immediately following you must install the SDL application which will convert the Named License to Shared License.
The SDL application can be found here:
“\\files22.brown.edu\dfs\CIS_ClientEngineering\partners\packages\adobe-creativecloud\Adobe Shared Device License”
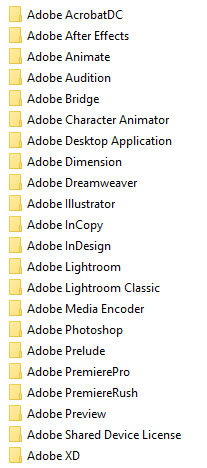
Here is a list of all Adobe software packages available via SCCM, Partner’s Share and Adobe Desktop Application:
Installing Adobe applications using the Shared Device License model:
1. From the user's computer go here:
\\files22.brown.edu\dfs\CIS_ClientEngineering\partners\packages\adobe-creativecloud
2. Select which application you wish to install by browsing the folder structure operating system and to the appropriate application
3. Run Setup.exe (windows) and finish installation
4. Go here after installing all of the Adobe products:
\\files22.brown.edu\dfs\CIS_ClientEngineering\partners\packages\adobe-creativecloud\Adobe Shared Device License
5. Run Setup.exe (windows) and finish installation
Once these steps have been completed, when the user launches the Adobe products, they will need to register their email address (personal or Brown email is acceptable). After they setup their account with Adobe, they can login using their email address and password they configured in the setup process. This should give any user of the Brown community access to any Adobe products.
Information for End-users:
Adobe has changed the way they license their software starting in January 2019. This has affected how users who are in the Public Computing Labs (PCL) access the Adobe software.
When using any Adobe products, you will need to use your existing Brown email address to access the software. If your Brown email address fails to get you in, you will need to create an Adobe ID. (This is the case for some categories of staff.)
1. Launch the Adobe software you wish to use.
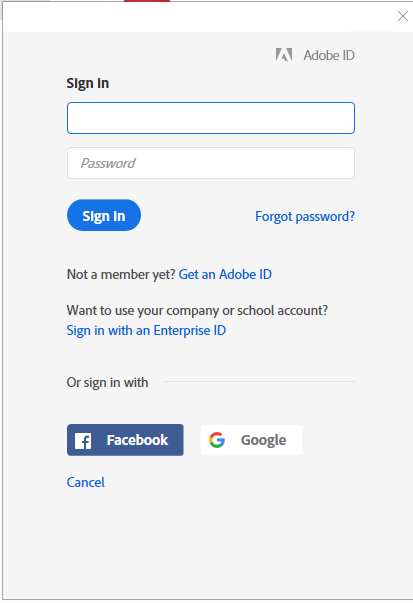
2. Enter your @brown.edu email address (do not enter a password) and press Enter.
3. Once you identify yourself with your @brown.edu email address, the system will prompt you to use two-factor to access the software:
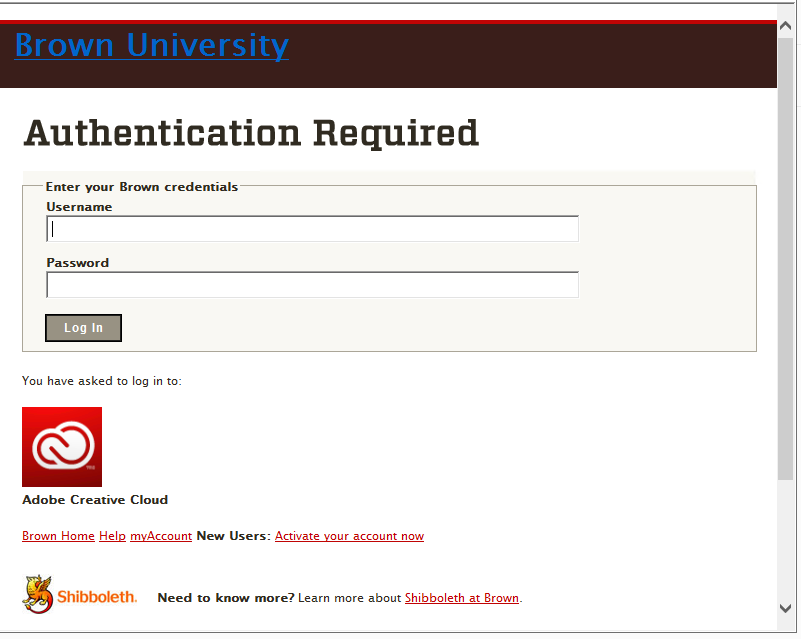
4. Enter your "ShortID" and password.
5. You will be presented with the "two factor" screen below:
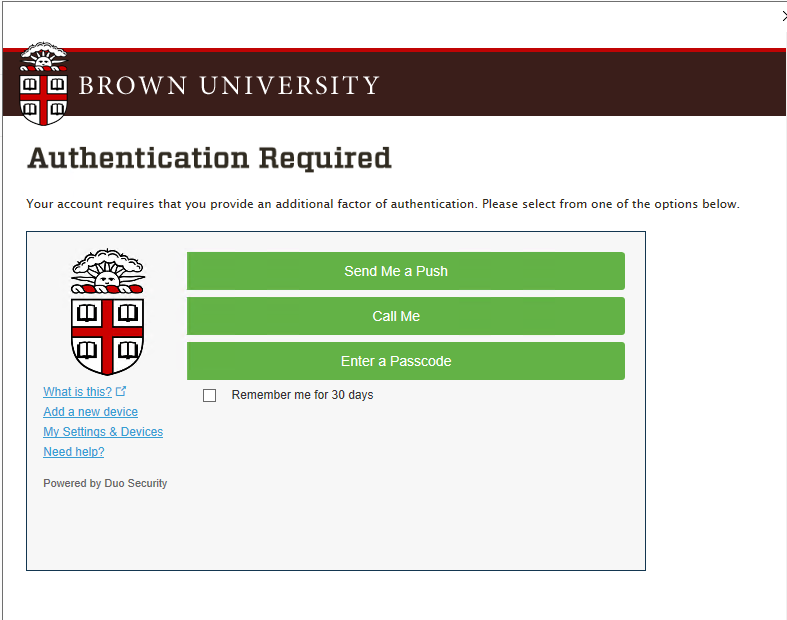
6. After you complete the two factor requirement, you will have access to the Adobe software product you requested.
If you are NOT able to access Adobe software using the steps above
You will need to create an Adobe ID:
1. Launch the Adobe software you want to use
2. Select "Get an Adobe ID"
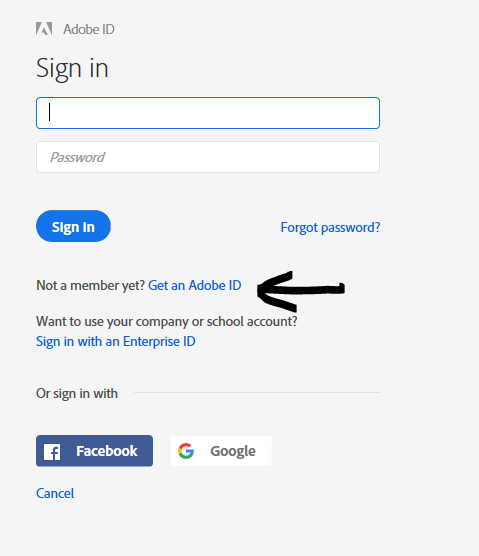
3. Fill out the form as shown below and click the blue "Sign up" button at the bottom.
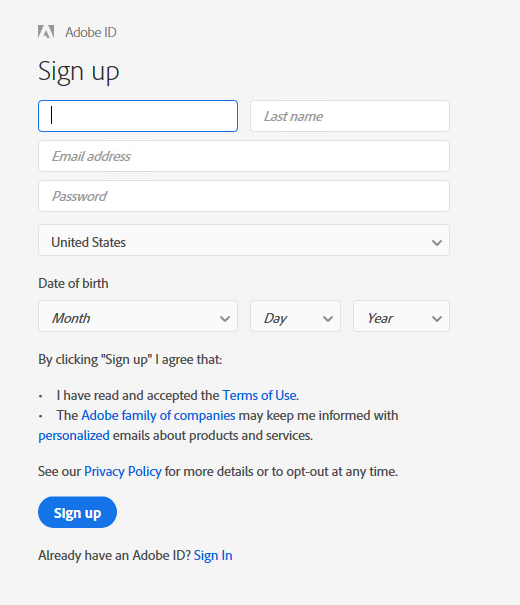
4. You will be able to access the Adobe software using the email address and password you provide in this sign up process.
