More information about the Sponsored ID process is available on the Brown Card Office website.
How to Get a Sponsored ID
Sponsored IDs are created by Departmental Identity Administrators (DIA). Each department controls its processes for requesting and creating Sponsored IDs. Sponsored IDs are assigned to individual people for up to 1 year periods, with renewals allowed.
If you are looking to request a Sponsored ID for someone who needs a Brown account (either for the first time or to renew their access), contact the DIA for your department.
Most Academic Department Managers are DIAs, or can help connect you to the relevant process. If you have questions about identifying your DIA, please call the OIT Service Center at 401-863-4357 or email [email protected].
-------------------------------------------------------------
The following information in this article is only relevant to DIAs at Brown.
How to Become a Departmental Identity Administrator
If you are already a Departmental Identity Administrator (DIA) for your department, you can skip this section. Not sure? Try the steps in the next section. If you don't see the Sponsored IDs link in MyAccount, you will need to complete these steps.
- Visit the link to fill out an IT Service Center ticket.
- In the ticket subject, indicate that you are requesting DIA access
- For Category, choose Account/Access Request
- For the subcategory, choose Application List (All Other Requests)
- Fill out the information for yourself and for the person for whom you are requesting access (if that is not you)
- From the list of applications, choose Department Identity Admin (DIA)
- In the description, include the department head's name and email address and any other relevant information.
Accessing the Sponsored ID Request Portal
- First, visit myaccount.brown.edu.
- Click the Manage Account link in the top menu.
- If you are not already logged into single sign-on, you will be asked to log in using your Brown username and password.
- If you are a Departmental Identity Administrator, or DIA, you will now see a Sponsored IDs link in the top menu. If you don't see this link, follow the instructions in the section above.
- After clicking the Sponsored IDs link, you’ll be taken to a page displaying your active requests.
Request a New Sponsored ID
See a video on how to create a new Sponsored ID at this link (this video is only visible to existing members of the Brown community logged in with an @brown.edu address):
- To request a new Sponsored ID, click the New Request button on the top right.
- The form has four parts, which are tabbed across the top. In the first tab, fill out the information about the person for whom you are requesting an ID.
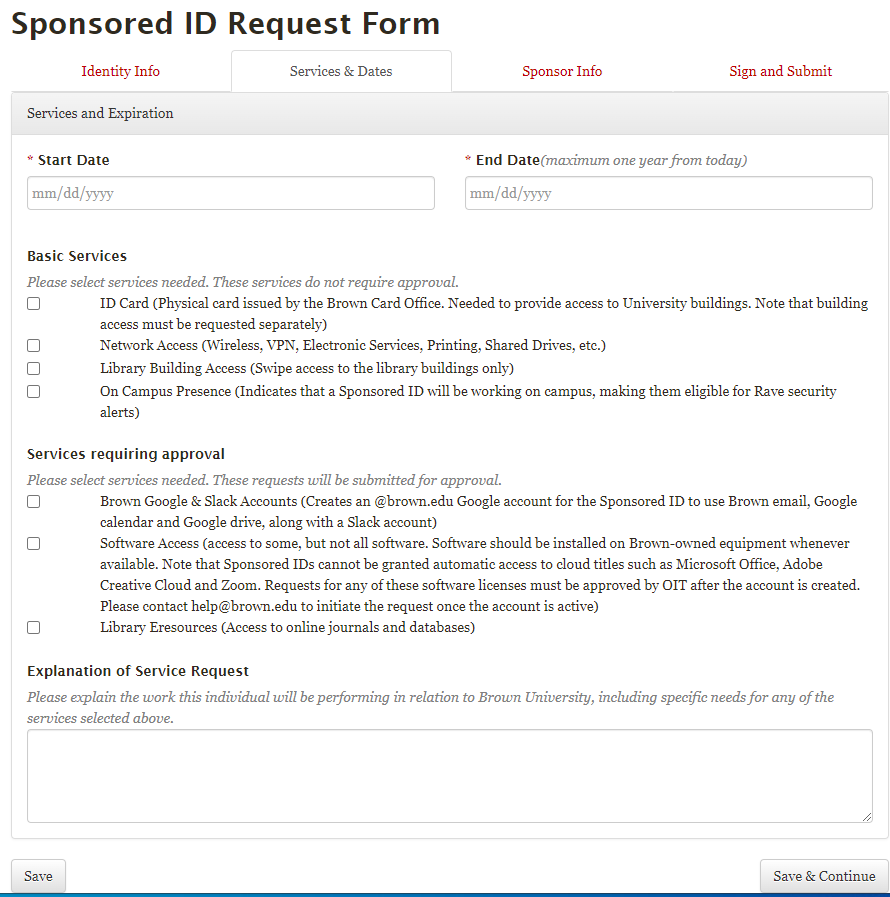
- On the second tab, indicate the start and end date, and choose services needed for the individual.
- On the third tab, fill out the information about the person sponsoring the ID. This could be you, or another member of your department who will be working with the individual. Start typing the sponsor's name and choose the correct person from the search results that appear. His or her information will automatically be filled into the name and email fields. Phone fields need to be filled in manually.
- The Sponsoring Department is a drop-down menu which includes all departments for whom you are the Department Identity Administrator. If you do not see a department listed here that should be, please contact the CAP office.
- On the last tab, review, sign, and submit your request.
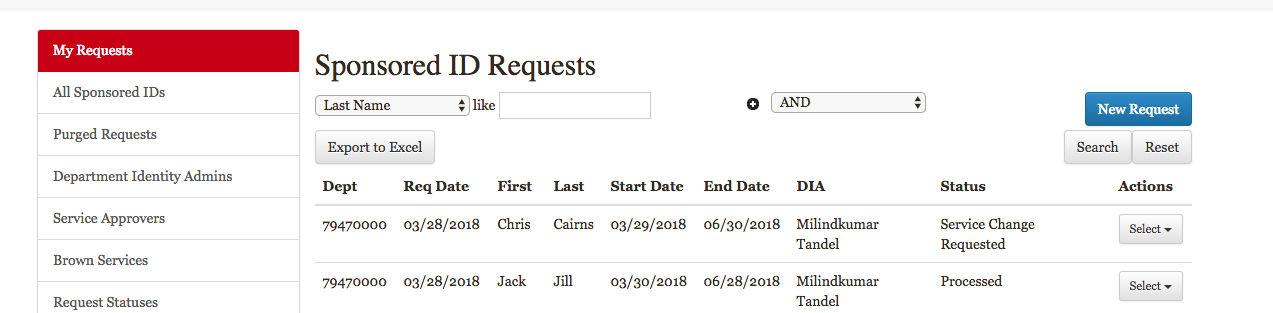
- After submitting your request, it will appear in the My Requests list, where you can check the status as noted below. After the identity is created, you will receive an email. When no more approvals are needed and the identity is created, it will disappear from this list and instead appear under All Sponsored IDs. If you see In Progress after a day or so, please review your request as it may not be fully completed.
Please note: in this system, an identity might be created before all services are added. This can be a convenient way to, for example, get a swipe card without having to wait for software access to be approved. However, if you requested a Google account, we recommend waiting for the account to be fully created before telling the Sponsored ID to activate her account. Otherwise, she will have to separately activate the Google account later, and this might be confusing.
Viewing In-Progress Requests
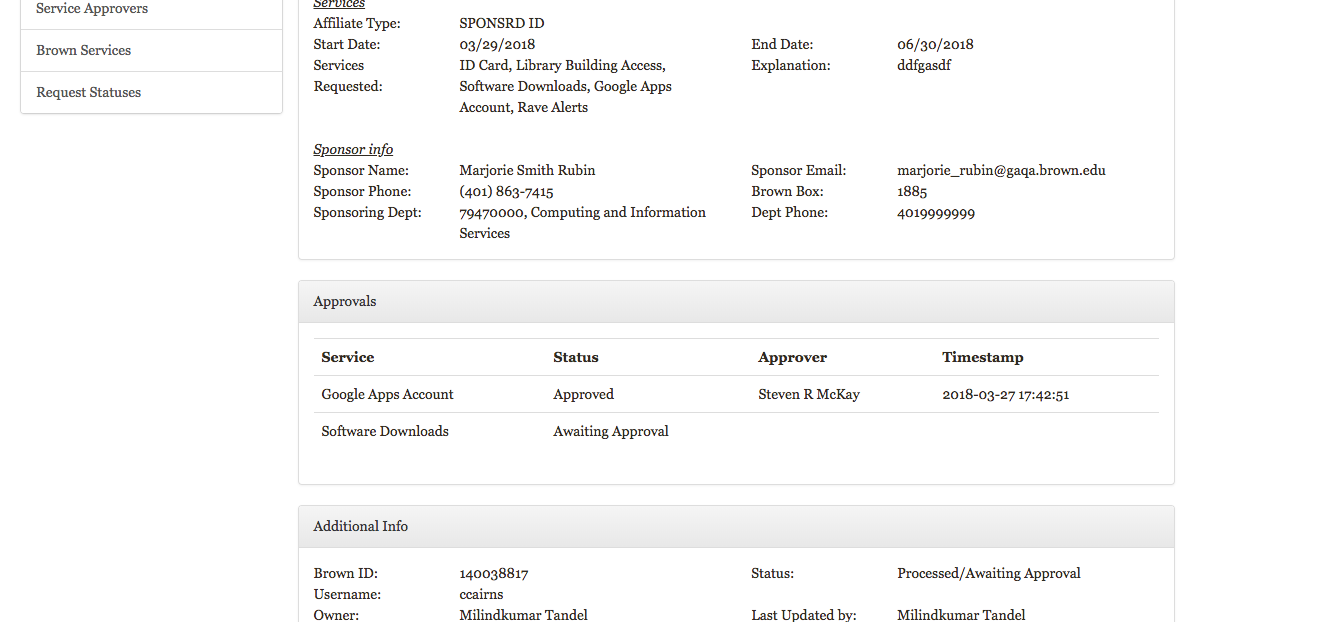
- The My Requests menu item lists all in-progress requests. You can check the progress of your identity here – for example, if any of the services you've requested needs approval, you will see approver names in the Updated By column. When no more approvals are needed and the identity is created, it will disappear from this list and instead appear under All Sponsored IDs.
- While your request is still active, you can view, edit, or delete the request.
View and Renew Sponsored IDs
- Access the Sponsored ID section of MyAccount as described above.
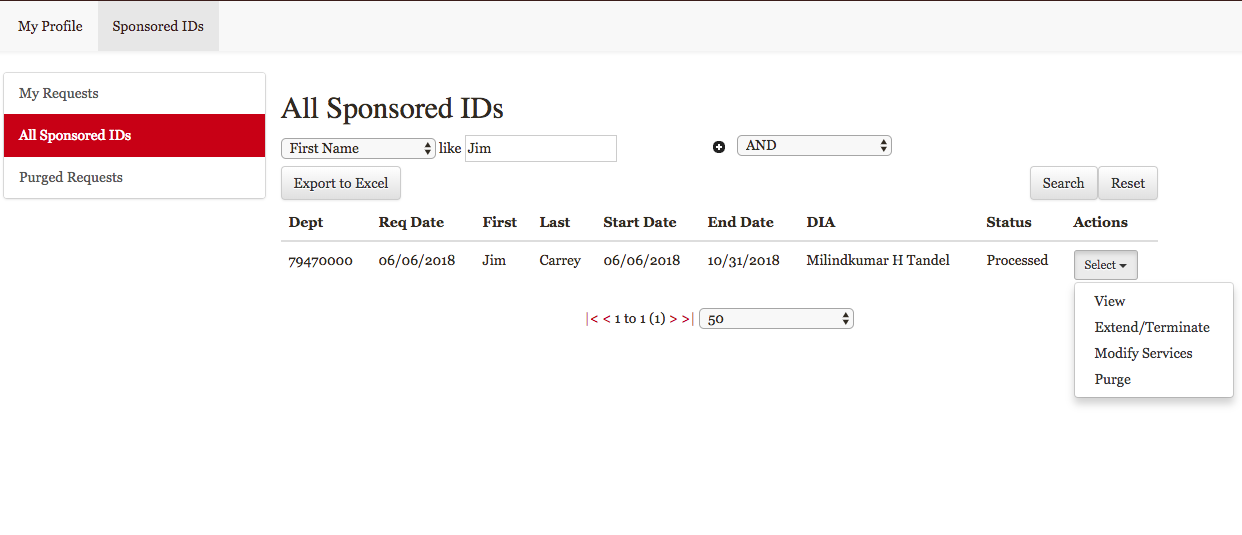
- To see all Sponsored IDs in your department (including ones other DIAs in your department may have requested), click the All Sponsored IDs link.
- In the Actions column, you can view the information associated with the request, and also Extend or Terminate the request by modifying the end date. To terminate, you can simply enter a past end date.
Modify Services
Requests that are not expired, have an additional action "Modify Services". This gives DIAs the ability to modify existing services without creating a new request.
- Click on Select under the Actions column and choose Modify Services
- Similar to a new request, you'll get directed to the Services page where you can add/remove services. Choose services, making sure to provide an explanation of exactly what software/services you are requesting and why they are needed to complete work for the University. This explanation goes in the "explanation of service request" text box at the bottom. Then click Modify:
- The status of the request will be changed to Service Change Requested
- The Card Office will then process the request and approvers will have to approve/deny the request similar to a new request. New services will be available once the request is approved and processed.