Adding Courses
To add a course, you first click on the "Add Course" button. You will then see the "Edit Course" window. If you want to add a course you have already taken, you will want the Source to be "Select from academic history." If you want a course you plan to take in the future, set the source to "Manually create/edit".

Adding a course from your academic history is straightforward-- simply select the course you want from the menu. You can then proceed with any extra concentration data or comments you want to enter.
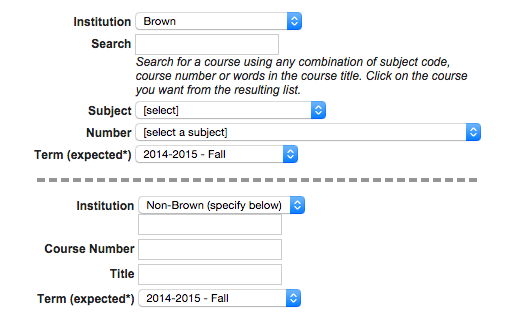
If you are adding a course you have not yet taken, there will be a couple additional steps. First, set the institution to either "Brown" or "Non-Brown". For Brown courses, you will need to select the subject and course number from the select menus. There is also a search field you can use to more quickly locate a course. For non-Brown courses, you will need to enter the institution, course number and title into the appropriate text fields. Regardless which type of course you are adding, you will also need to select the term in which you plan to take the course. Note that the term menu will only include the current and future terms. Any course from a past term should be added using the academic history.
 Depending on your concentration, there may be additional information requested of you beyond the course and term. In this example from International Relations, you would be expected to tag each course with how it fits into your plan of study.

Editing a Course
To edit a course, you click on the appropriate "Edit" link. You will then see the same edit window described above, which you can work with in the same way. Note that you can switch between "Manually create/edit" and "Select from academic history", and if you are working with a course you have taken since you last edited the course plan, that's probably something you'll want to do.
Indicators and Icons
There are two types of special indicators you may see in your course plan. The course status icon shows whether the student has received credit for the course, and whether the course was taken when the plan said it would be. The key for these icons is below:
![]()
For Brown courses you manually create, you should see the indicator start empty and then shift to one of the others as appropriate. However, for non-Brown courses you manually create, this won't happen. Instead, these courses will get flagged as "not taken". To fix these courses, you will have to edit the course and replace your manually entered data with a selection from your academic history.
The second indicator you might see is only relevant for students with more than one concentration. If you see a thick red line on the left of a given course, it means that the course is also listed in one of your other concentrations. Brown has a rule that only two courses can overlap between concentrations, so if you are a multiple concentrator you'll want to pay special attention to these. See below for an example of this.

