OIT manages a cluster of FileMaker databases hosts for department use. We currently are migrating to FileMaker 19 Server. Clients may access the databases hosted on our servers with FileMaker Pro version 18 or higher or FileMaker Go version 18 or higher on iOS.
You will need to be connected to Brown's VPN service to access databases from off-campus.
Download and install FileMaker Pro from the Self Service app (on OIT managed mac workstations) or from our software website here: https://www.brown.edu/information-technology/software/catalog/filemaker-pro
1. Open FileMaker Pro.

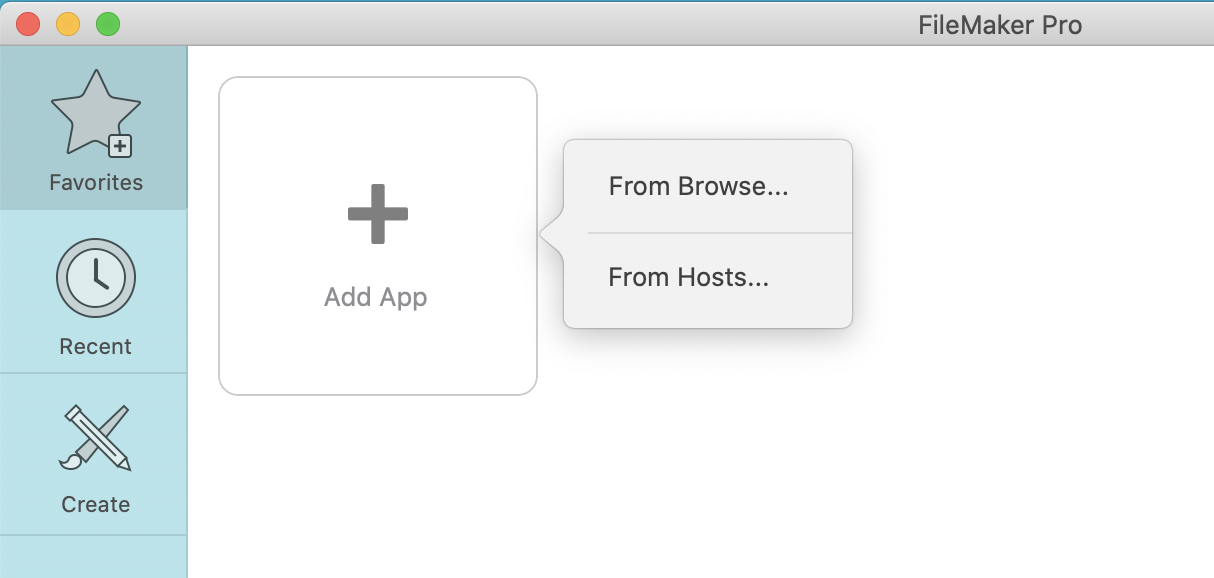
2. When FileMaker Pro opens you will be in the Launch Center. Click on Add App which will open a small popover menu. From the popover menu, select From Hosts...
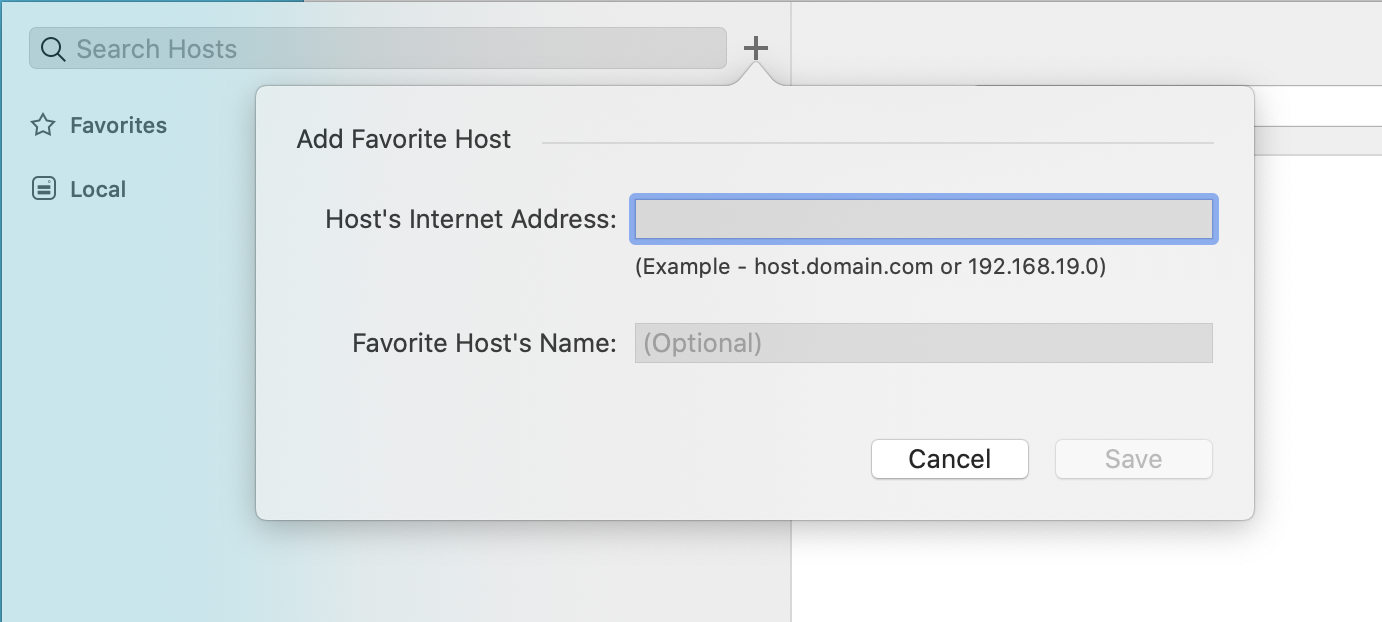
3. In the Hosts window, click on the + symbol at the top of the hosts list to create a new FileMaker server connection.
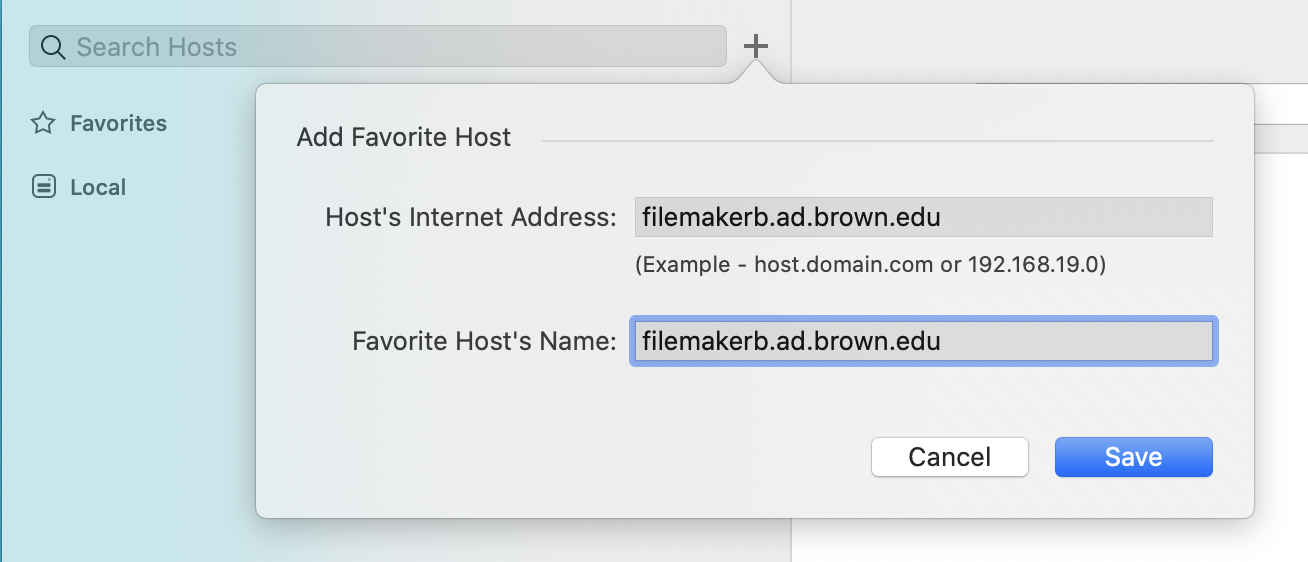
4. In the Add Favorite Host screen, enter the name of the FileMaker server you are trying to access in the "Host's internet address" field and click Save.
Current list of active FileMaker servers:
filemakerb.ad.brown.edu
filemakerc.ad.brown.edu
filemakere.ad.brown.edu
filemakerf.ad.brown.edu
filemakerg.ad.brown.edu
filemakerh.ad.brown.edu
filemakeri.ad.brown.edu
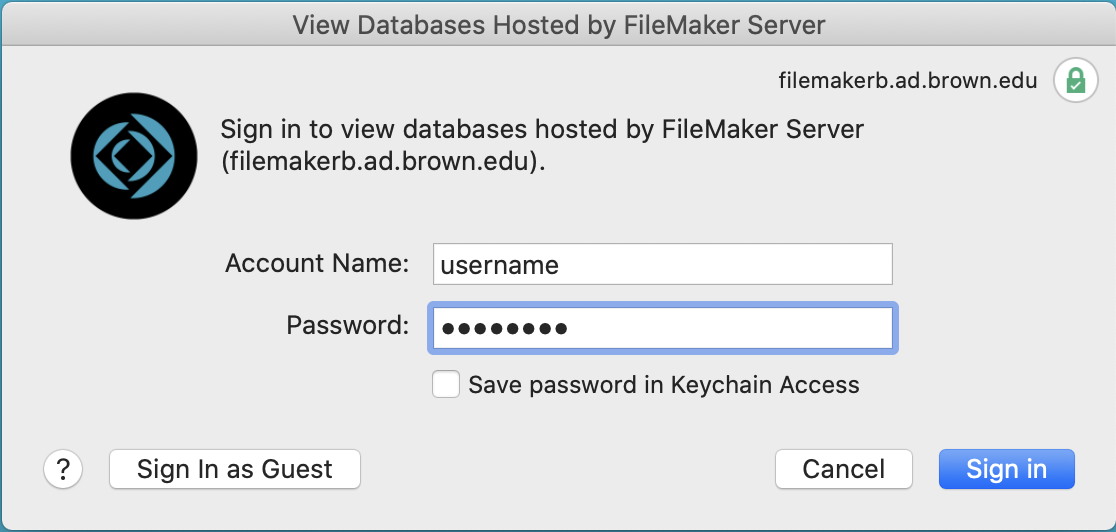
5. If prompted, enter your Brown username and password (or other database credentials) into the FileMaker server authentication screen and click Sign In.
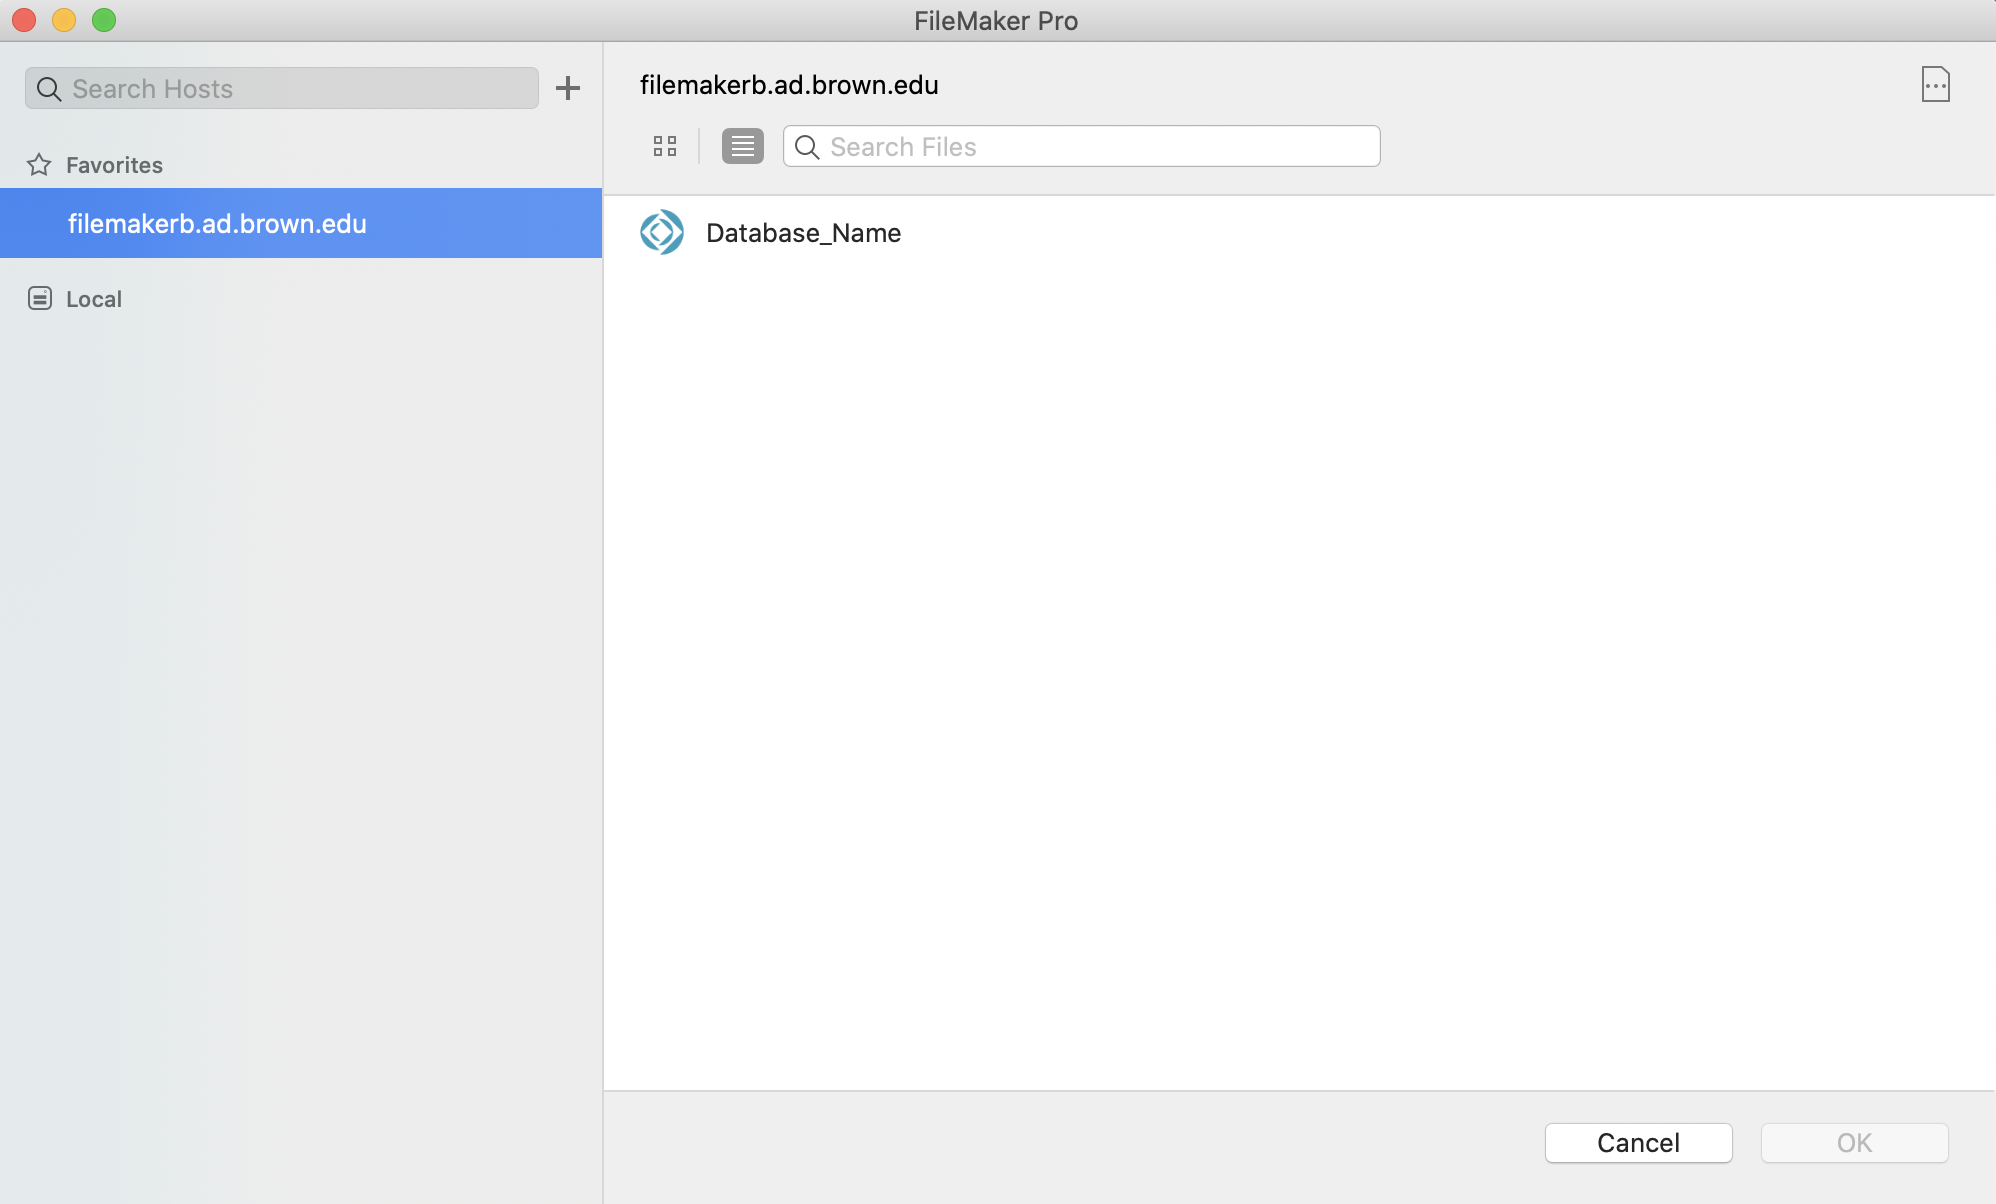
6. At this point, you should see a list of databases on the server. Locate your database on the server and double-click on it to add it to your Apps in the Launch Center.
7. Back in the Launch Center, double-click on the newly added database under My Apps to open it. Log into the database with either your Brown username/password or with a username/password assigned by your department's database manager.
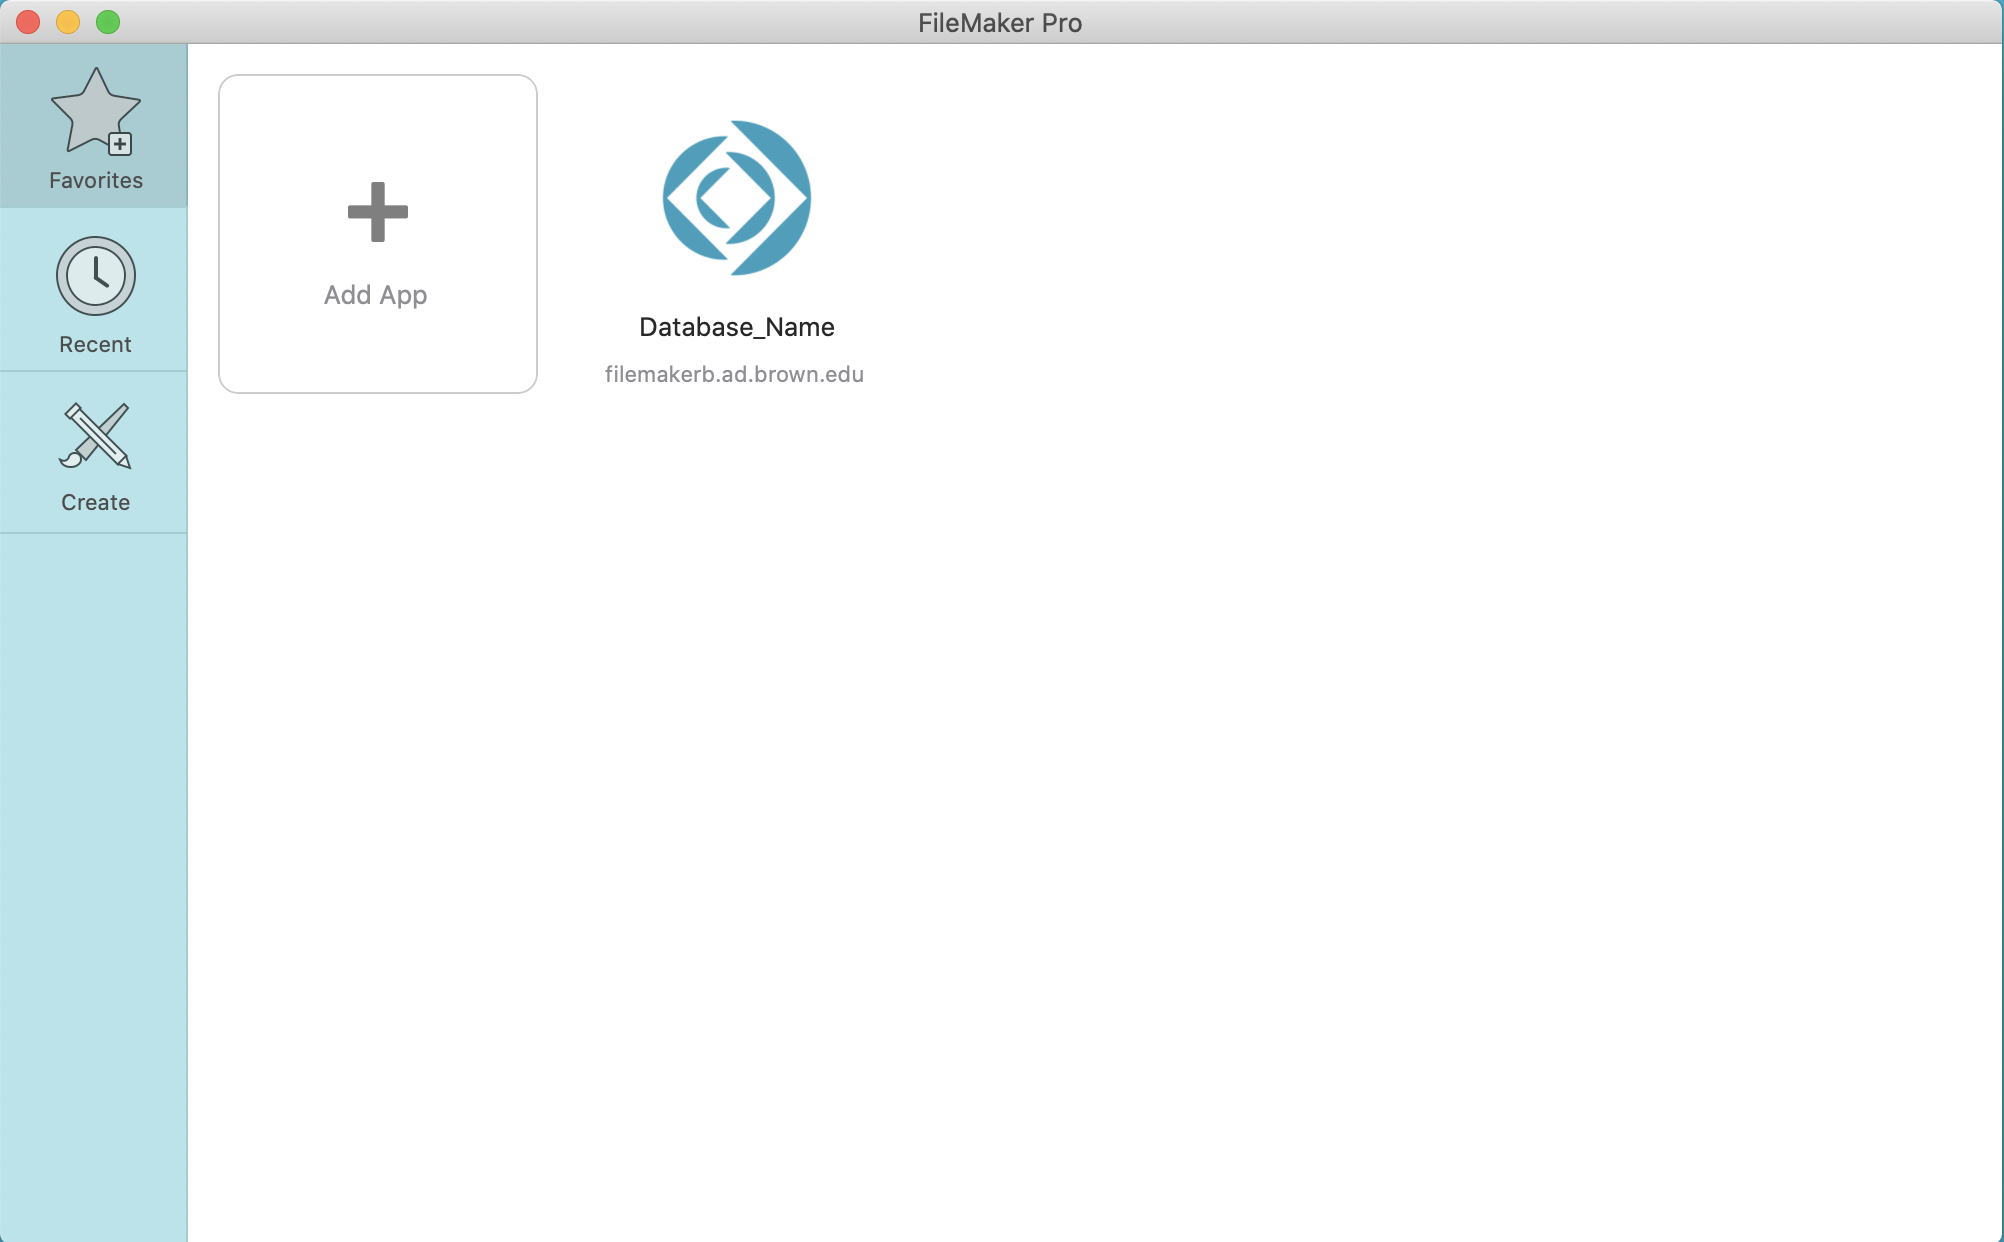
8. The next time you open FileMaker, the database will be in the My Apps section of the Launch Center. You can also quickly access recently opened databases in the Recent tab of the Launch center.
