Remote Accessible - Zoom-Ready
Welcome to your Zoom Ready Classroom. This room will function just as any other room. The Audio/Video system is the same as before, but also has a built in camera and microphone for remote learning (see pictures below). This will allow your students to see and hear you and others within the class, all right from your laptop.

To begin projecting plug the HDMI cable into your computer (We also have different adapters connected to these cables in case they are needed)
- The rooms Audio / Video system should automatically recognize your computer’s display. You should notice the projector warming up as soon as you connect the HDMI cable. (For rooms equipped with a motorized screen, this will also trigger the screen to come down.)

2. To connect the microphone and camera to your laptop, plug in the USB to your computer.
- (A USB-C adapter is attached to the cable if needed)
3. Start your scheduled Zoom Meeting from Canvas
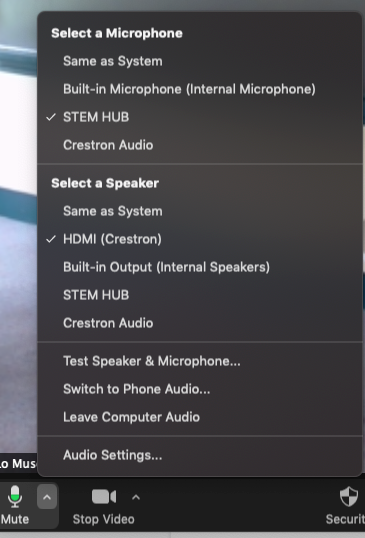
4. Click on the arrow to the right of the Unmute button to make sure your Microphone is set to STEM Audio and your Speaker is set to Crestron.
- (You can click on the Test Speaker & Microphone button to confirm your settings are correct.)

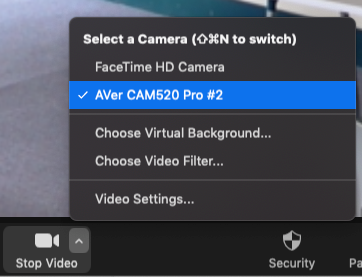
5. Next click on the arrow to the right of Start Video to select the installed AVer CAM520 Pro as your camera
- For information on how to control the in-room camera, visit the AVer CAM520 Pro Guide.

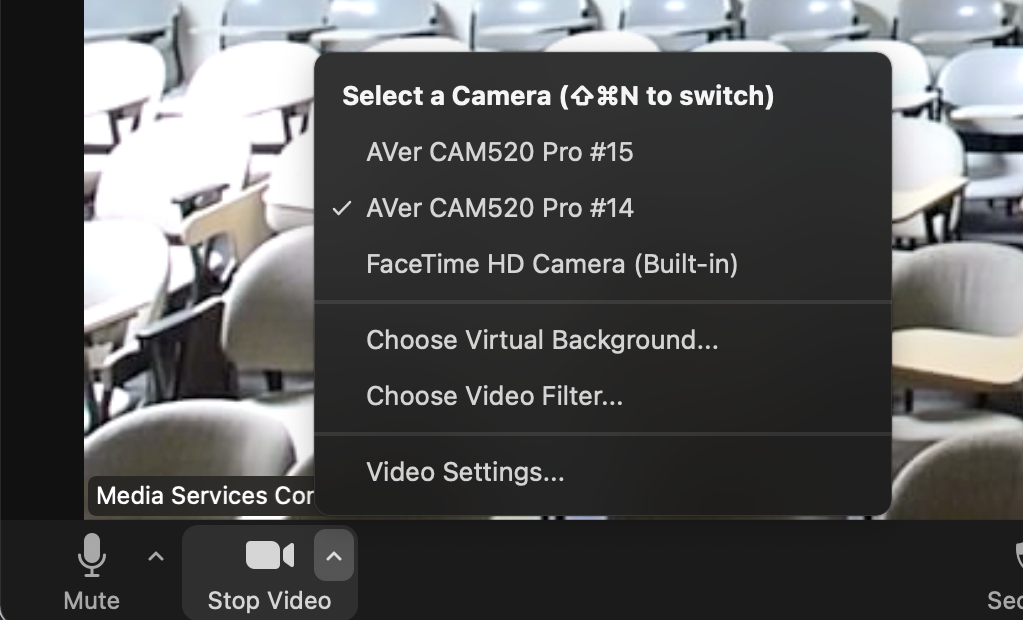
- Some rooms are equipped with two camera you can switch between the different cameras by selecting which camera is preferred.

