A Media Access Control (MAC) address is a unique numeric identifier used to distinguish a device from others on a network. The address is assigned by the manufacturer, for Ethernet and Wi-Fi cards. Your device therefore is likely to have two MAC addresses.
Testing your Xbox Live Connection
Windows
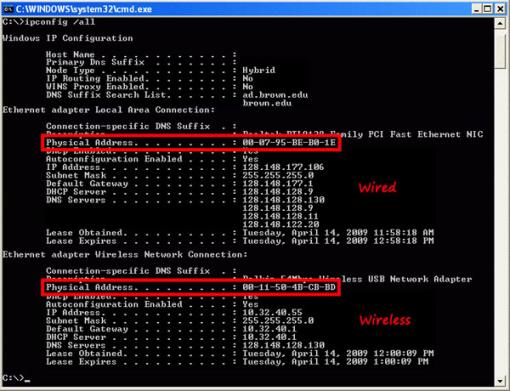
Get your computer's Wired or Wireless MAC address from the Command Prompt Screen:
- Select the Start button.
- Type command in the search box (Start->Run for Windows XP) and press Enter.
*At the Command Prompt, type *ipconfig /all Note: Be sure to put a space between ipconfig and /all!- Press Enter to list the connection information for your wired and/or wireless connections.
- To find the Physical Address for your connection:
- The wired physical address will be listed under Ethernet adapter Local Area Connection
- The wireless physical address will be listed under Ethernet adapter Wireless Network Connection
- Write down or copy/paste the addresses for future reference.
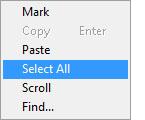
Copy this information from the command prompt screen into a notepad document:
- Right-click anywhere in the command prompt window and choose Select All.
- Press Enter to copy the text from the Command Prompt screen.
- Open up Notepad (Start->All Programs->Accessories->Notepad).
- Right-click and choose Paste to put the information into the document.
- Save and Print the document and keep it with your important papers.
Mac (OSX)
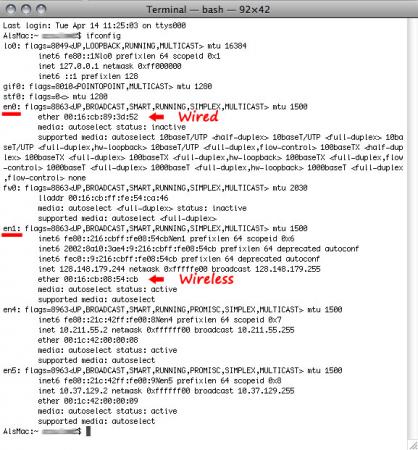
To get your computer's Wired or Wireless MAC address from the Terminal Screen:
- Locate and open Terminal from Applications->Utilities->Terminal.
- At the Terminal Prompt, type ifconfig and press Enter. This will list all of your network settings, including the physical addresses of your wired and wireless hardware.
- To find the Physical Address for your connection:
> The wired physical address will be listed under en0
> The wireless physical address will be listed under en1 - Write down or copy/paste the addresses into a document for future reference. You can also directly print it by going to Shell->Print. Keep this document with your important papers.
Apple TV
- On the box: Look for the Wireless ID near the UPC label
- On the Apple TV: Go to Menu > Settings > About and look for the Wireless ID
Chromecast
PLEASE NOTE that Chromecasts do NOT currently work at Brown. Sorry!
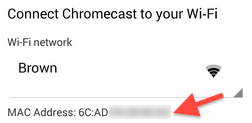
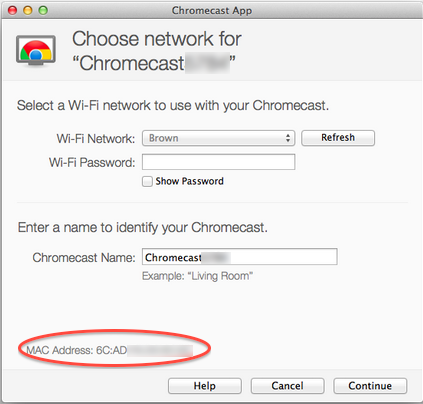
In most cases, it will be listed on the page which asks you to select a wireless network (below are screenshots for Android and Mac). On a PC, you may have to click Settings to get to this page.
Amazon Echo
- Download the Amazon Alexa app to your phone or computer and sign in with your Amazon account.
- Connect to the wireless network transmitted by your Echo device.
- The wireless MAC address for your Echo can be found at the bottom of the Echo Setup screen in the Alexa app.
PlayStation 2
- Install the network adapter given in the installation guide or on the PlayStation 2 Network Adapter Web site. Once you have the network adapter installed you are ready to begin the ISP Setup process.
- Power up the PlayStation 2 and load the Network Adaptor Startup Disc.
- Once it has loaded, select ISP Setup and press X.
- The ISP SETUP will begin to load, and you will be presented with a license agreement. Select Agree and press X to continue.
- For connection type, choose Local Area Network (LAN) and press X to continue.
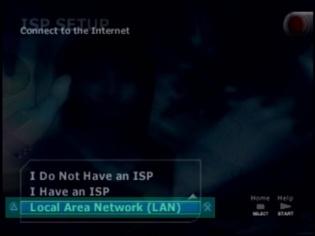
- Select Automatic Configuration and press X to continue.
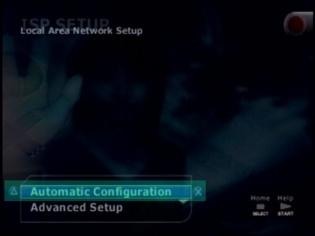
- At the connection test screen, select Advanced and press X to continue.
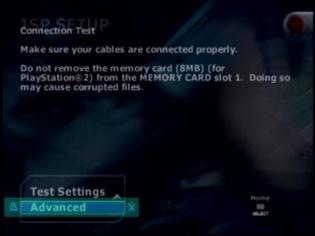
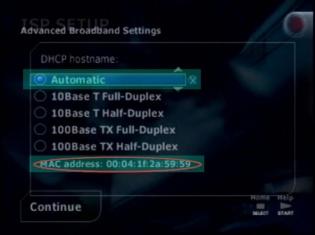
- At the Advanced Broadband Settings screen, make sure Automatic is selected. While you are at this screen, make note of the MAC Address at the bottom. You will need this number to register your game console.
Playstation 3
- Power up the PlayStation 3 without any disc in the drive.
- Once the PlayStation 3 operating system has loaded, select "Settings."
- Once you are in "Settings" select "Network Settings."
- When the "Network Settings" list appears, select the first option which is titled "Settings and Connection Status List."
- The physical address will be listed under "MAC Address"
Samsung Smart TV
- Go to your TV's menu and choose Network > Network Settings
- Choose Wireless for your connection type
- Choose to connect to the Brown-Guest network
- On some Smart TVs, you will see the MAC Address on the next screen.
If it is not displayed, go back to the menu and choose Network > Network Status.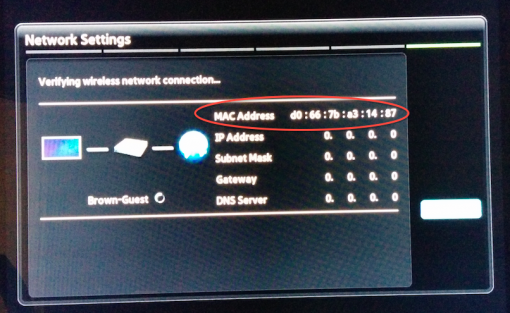
Wii
The Nintendo Wii is unable to access the Brown network via wireless connection and will require the purchase and use of the Wii LAN Adapter.
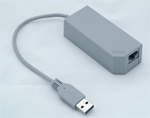
- When at the Wii menu screen, click the Wii icon in the lower left corner.
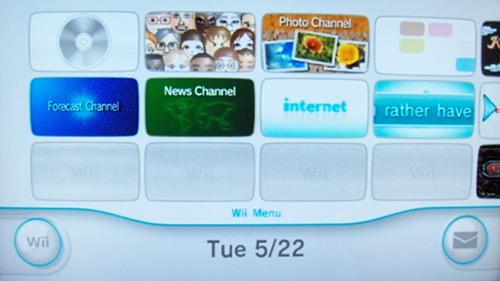
- Select Wii Settings.
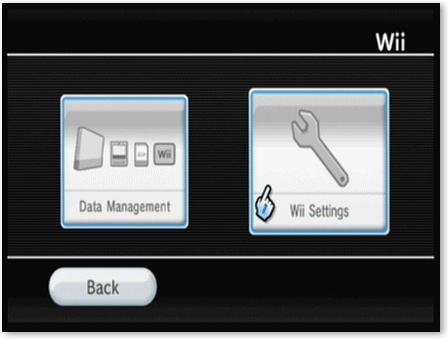
- Click the arrow on the right side of the screen to advance to the next page of settings.
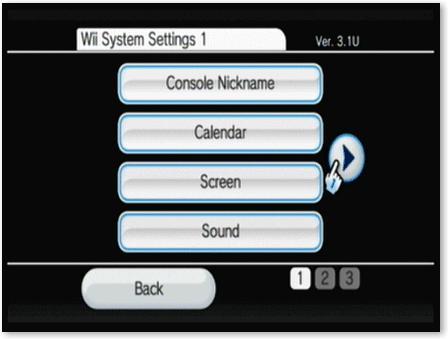
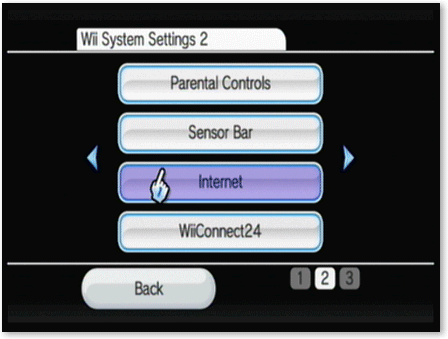
- Select Internet.
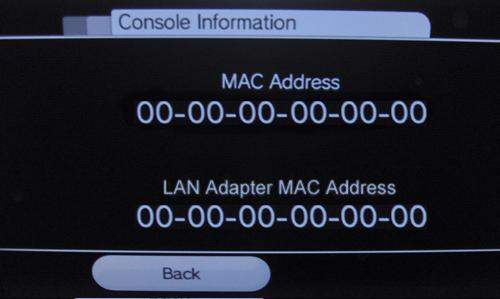
- Select Console Information.
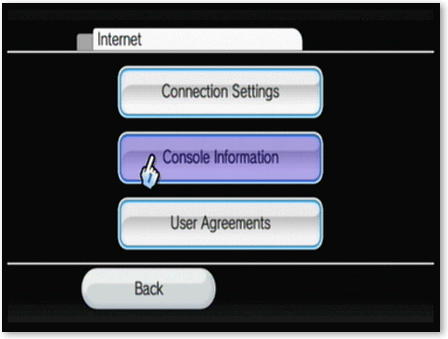
- The MAC address for your console will be displayed under the LAN Adapter MAC Address listing(the second line).
Xbox
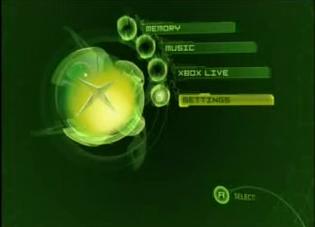
- Insert your Xbox Live DVD in the drive. The software will automatically run and update the Xbox dashboard to show the Xbox Live option. Once this is complete, eject the CD and make sure you have your network cable plugged into your Xbox and in the network port. Open the Settings menu.
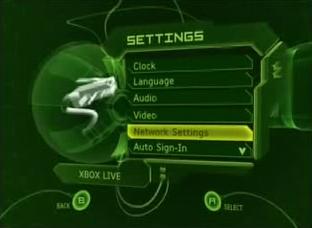
- From Settings, go to Network Settings.
- Within the Network Settings Menu, go to IP Addresses.
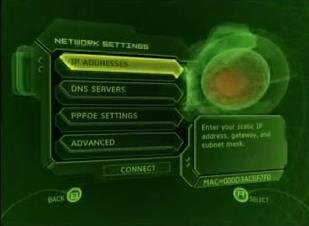
- Once in the IP Addresses Menu, be sure the configuration is set to Automatic.
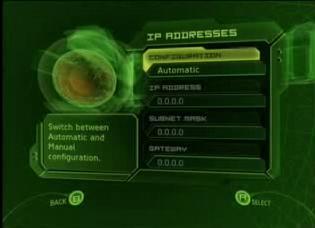
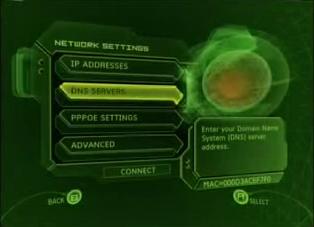
- Press B and go back to the Network Settings menu, then go to DNS Servers.
- Once in the DNS Servers Menu, be sure the configuration is set to Automatic.
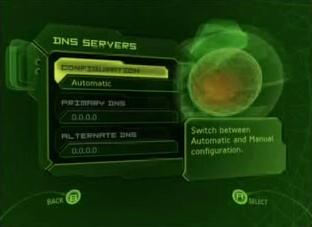
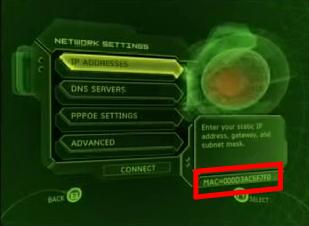
- Press B and go back to the Network Settings menu, there you will then see the MAC address in the lower right hand part of the screen. Write this MAC address down somewhere.
Xbox One
If you are able to reach the main menu on your Xbox, follow the steps below to locate the wired MAC address of your console.
- If you are signed into your profile, navigate to My Games & Apps. **Skip this step if you are not signed into a profile.
- From there, select Settings.
- In the settings pane, select Network.
- Select Advanced Settings.
- Record the Wired MAC address on this screen. It should be in the format "00:00:00:00:00:00."
Xbox 360
- Go to the System area of the Xbox Dashboard and select Network Settings.
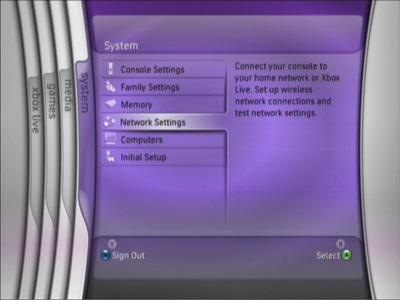
- Select Edit Settings.
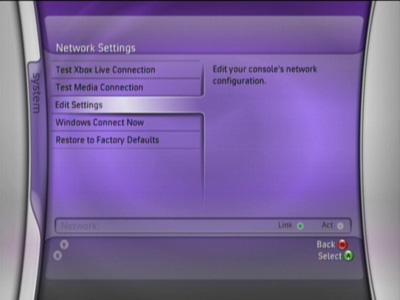
- Under Basic Settings, check to make sure the IP Settings is on Automatic.
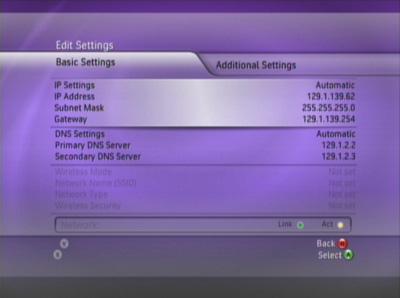
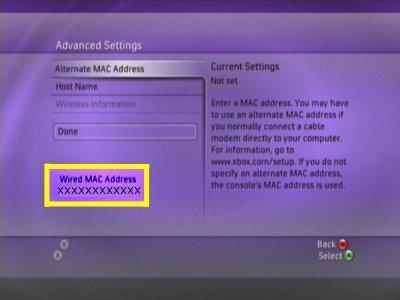
- Now go to Additional Settings, select Advanced Settings.
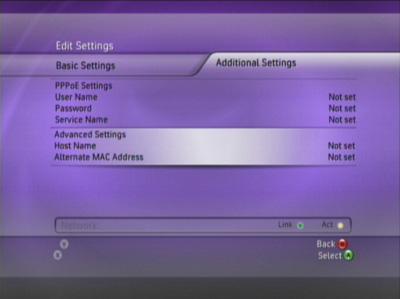
- At the bottom of this screen you'll see a heading called Wired MAC Address.
Testing your Xbox Live Connection
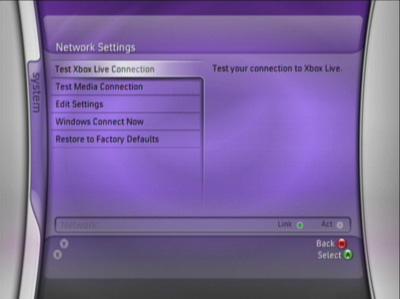
- Once you have registered your Xbox 360 with the BGSU network, you can test your Xbox Live Connection. Go to the System area of the Xbox Dashboard and select Network Settings. From this menu then select "Test Xbox Live Connection".
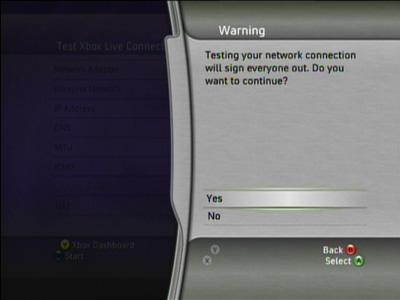
- The next screen will warn you that testing your network connection will sign everyone out. Select "Yes" to continue.
- Testing of all Xbox Live connection will then take place.
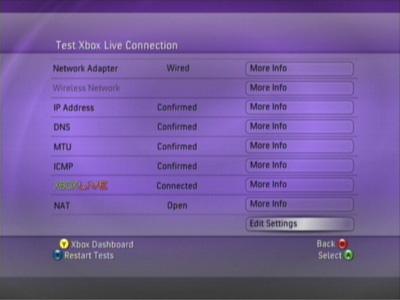
- To begin using your Xbox Live connection, Go to the Xbox Live area of the Xbox Dashboard and select the graphic that reads "Xbox Live".
