Contents
Prerequisites
Enabling IMAP
Enabling Less Secure Apps
Setting up Outlook
Adding Account
Set up IMAP
More Settings
Google Two-Step
Prerequisites - Change Google Settings
- Log into Gmail.com using your Brown email address and password.
- Once you have signed in go to your Gmail Settings by clicking on the Gear/Cog in the top, right-hand corner.

- Click on the Forwarding and POP/IMAP tab.

-
Enabling IMAP
-
- Enabling IMAP by choosing Enable IMAP in the IMAP Access section to enable it. You can leave all other settings default.
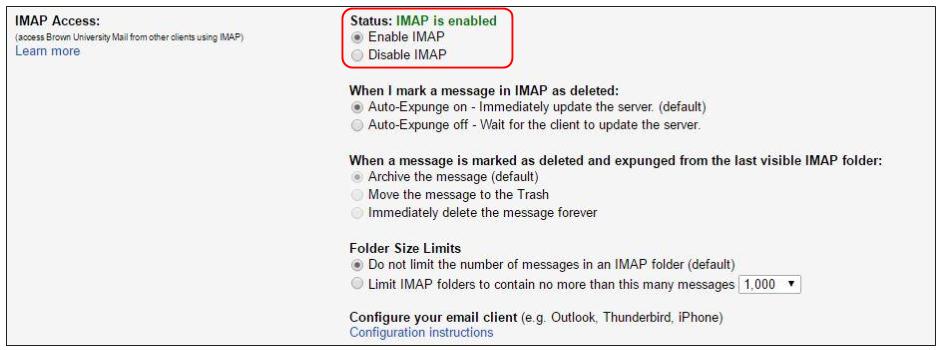
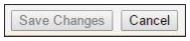
- Save Changes
-
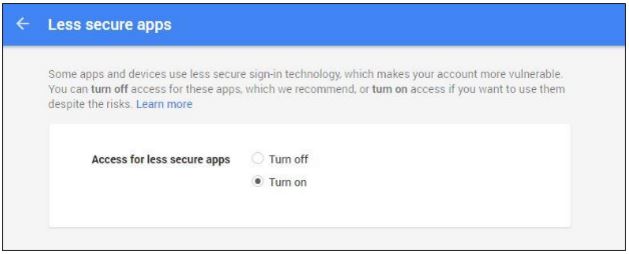
Enable Less Secure Apps
-
- While logged into your Brown Google account, visit the link below and Turn On Less Secure Apps.
-
Once this change is made, we are now ready to setup your account in Outlook.
Setting up Outlook
The steps below will display the process for adding the account. The screens will be displayed automatically if you are using Outlook for the first time. If you are adding your Brown Gmail account as an additional account, follow the steps below to start:
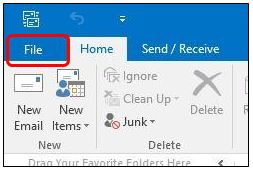
- Click File on the top, left-hand corner.
- Click on Accounts Settings, then Account Settings again.
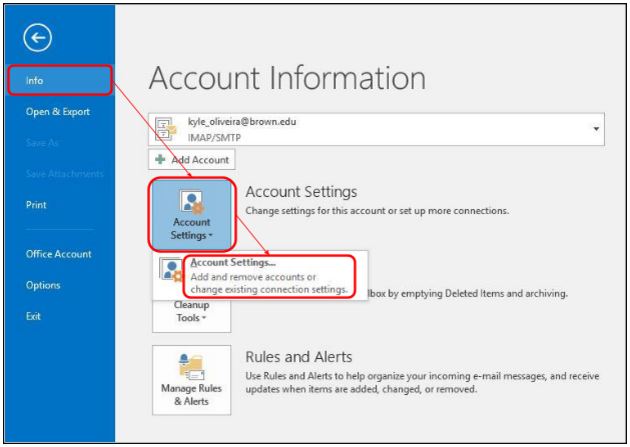
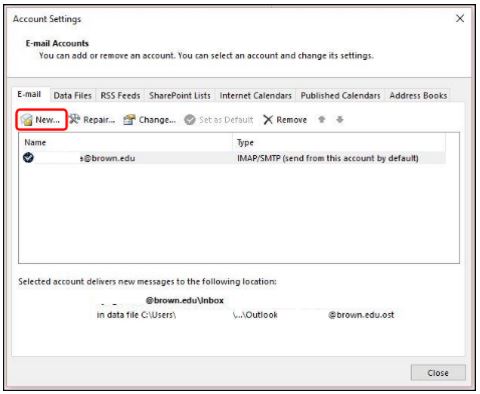
- Click on New… to start adding the account.
-
Adding Account
-
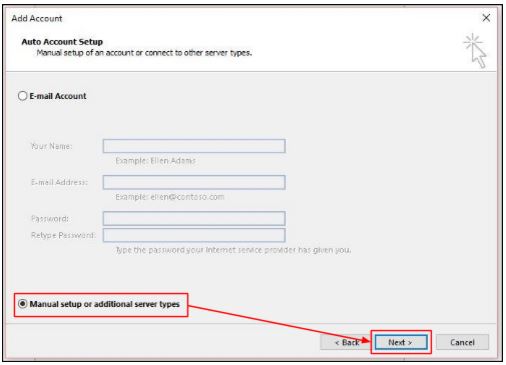
- Choose the Manual setup or additional server types option and click Next.
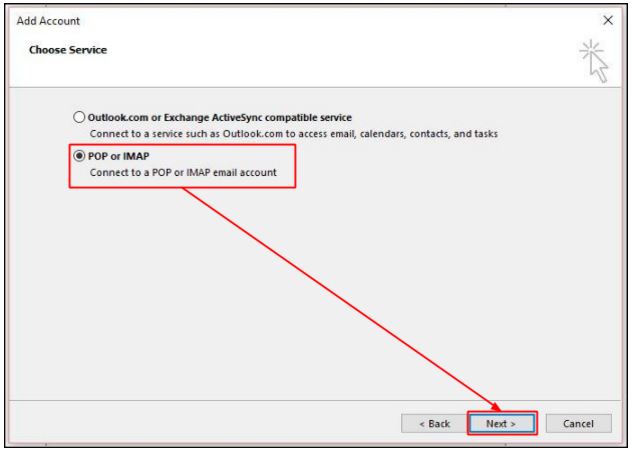
- Choose the POP or IMAP and then click Next.
-
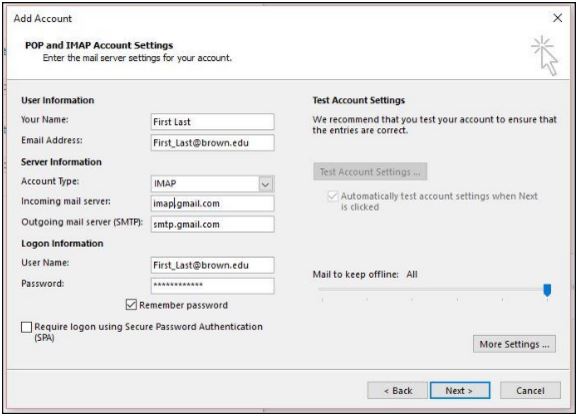
Set up IMAP
-
- Match the settings in this configuration window to match the settings displayed in the picture below. This is for IMAP only.
-
More Settings
-
- Once you have chosen the POP or IMAP settings and have configured it properly to match the settings outlined above, click on More Settings…
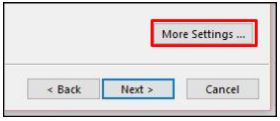
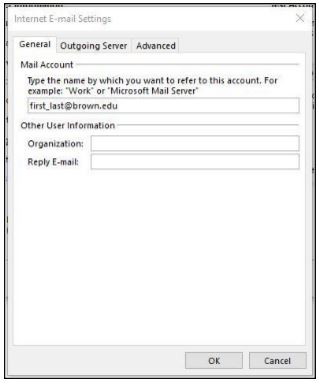
- Clicking on More Settings… will display a new window.
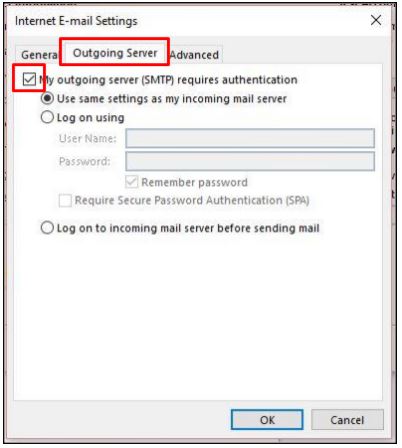
- Click on the Outgoing Server tab and make sure My outgoing server (SMTP) requires authentication has been checked off.
- Click on the Advanced tab and modify the setting to match the settings below.
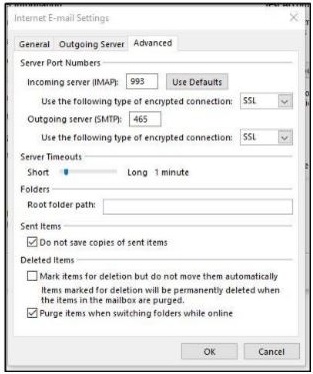
- Once you matched the settings, click OK
- Click Next when you have returned to the previous window.

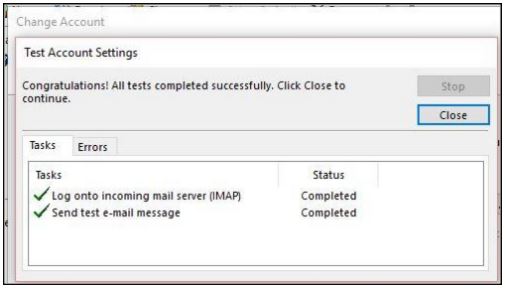
- A window will appear testing the settings. Click Close once you recived Completed statuses.
-
- If you receive any errors, please review the settings again.
Once you have successfully added the account, click Finish. Your Gmail should start syncing.
Google Two-Step Enabled Accounts
If you are using the Google Two-Step authentication method, you will not be able to use the steps above with your password. You will have to create an app-specific password for this to work.
Refer to this Google Help Article and review the steps outlined in the How to generate an App password section.